
Every animator has experienced that moment of uncertainty when they lift their stylus and question whether their current drawing truly flows from their previous one. Does the arm extend too far forward? Is the spacing incorrect? That's why onion skinning exists. You've come to the right place if you've ever wondered what this method is and how to apply it effectively across various animation styles and tools.
The method dates back almost a century. It was discovered by Disney animators in the 1920s when they stacked transparent paper on a lightbox and allowed the light to pass through earlier drawings to inform the subsequent one. With the exception of the digital controls, customizable frame range, and color-coded ghost frames, contemporary animation onion skin tools precisely mimic that physical method. From hand-drawn cels to stop motion tools like Dragonframe, Blender, Adobe Animate, and TVPaint, the idea remained constant.
This article explains what onion skin animation is, how it functions with various tools and workflows, and above all, how to use it wisely instead of just turning it on all the time and hoping for the best.
What Is Onion Skinning in Animation?
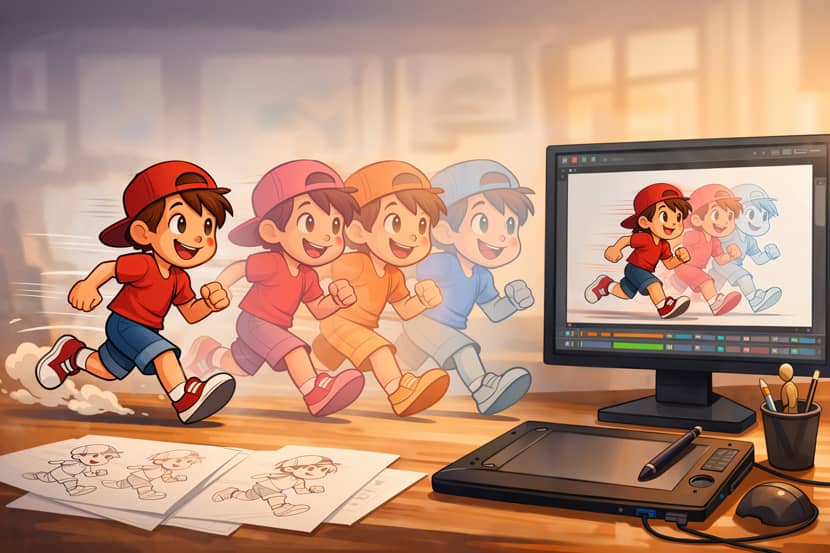
Onion skinning in animation is a technique that displays multiple frames simultaneously as semi-transparent overlays, letting you see where your character was and where they are going — all while you draw the current frame. The frame you are actively working on appears solid and fully visible, while the surrounding frames appear as faded "ghosts" behind it. This ghosted view gives you instant spatial reference without ever having to scrub back and forth through your timeline.
You might also hear it referred to as ghosting or ghost frames — the terminology shifts depending on the software and the animator using it, but the underlying idea is always the same. In most software, past frames appear in one color (commonly blue or red) and future frames in another (often green or orange), making the direction of motion immediately readable at a glance.
It is worth noting that onion skinning is not a passive feature. The settings — frame range, opacity, color coding, and which frames are displayed — need to be actively adjusted for each type of animation sequence. Leaving everything on default is how onion skinning goes from being genuinely useful to being background noise.
This brief explanation from the Start Animating channel does a fantastic job of breaking down the fundamental concept of onion skinning for anyone who is unfamiliar with it. It explains what it is, where it originates, and how it applies to both traditional and digital workflows. Before reading the rest of this tutorial, it's worth watching.
Why Is It Called Onion Skinning?
The name comes from a much older era of animation. Disney animators in the 1920s worked on sheets of translucent paper — thin enough that when placed on a lightbox, the light from beneath would pass through and make the drawings on previous sheets faintly visible from above. When multiple sheets were stacked together, the semi-transparency of the layers resembled the thin, layered skin of an onion.
By positioning a new blank sheet over the completed frames below, the animator could draw the current pose while referencing the movement that came before it. The lightbox illuminated the entire stack, and the animator worked on the topmost sheet, guided by the ghost of every frame drawn beneath. Decades later, when animation moved into digital software, the term followed — even though there is no paper involved anymore.
How Does Onion Skin Animation Work?
Onion skin animation works by rendering faded copies of adjacent frames behind the active frame in your viewport, giving you a live visual reference for the motion path your character is tracing through time. You draw your current pose while simultaneously seeing where your character stood one, two, or three frames ago — and depending on your settings, where they will be a few frames ahead. This reference helps you make consistent spatial decisions about distance, angle, and direction without guessing.
The reason this matters so deeply goes back to how we perceive motion itself. Our brains do not actually see movement — we see a series of still images and our visual system fills in the gaps, a phenomenon known as persistence of vision. Onion skinning makes that gap-filling process visible to the animator during creation, so you can deliberately shape what the viewer's brain will perceive during playback.
Using Onion Skinning for Inbetweening
Inbetweening — drawing the frames that sit between two key poses — is where onion skinning becomes genuinely essential. Keyframes define the major poses, and the inbetweens create the transitions that make them feel alive. With onion skinning active, you can see exactly where your new drawing needs to land between two existing poses. There is no ambiguity, no measuring by eye — the ghost frames tell you the answer directly.
Getting inbetweens right is one of the most demanding parts of the animation process, and it is where onion skinning proves its value most directly. The distance and direction between ghost frames tells you not just where to place the new drawing, but how much the shape should change — giving you both spatial and visual guidance at the same time.
Key Takeaway: Onion skinning helps animators see exactly where each new drawing should be placed between key poses.
Why Onion Skinning Is More Than Just a Visual Aid
It would be easy to dismiss onion skinning as simply a convenience feature — a way to peek at nearby frames. But experienced animators treat it as something closer to a motion control system. It is not just about seeing what came before; it is about using that visual information to plan motion with intention.
With your ghost frames visible, you are effectively running a timing consistency check in real time. You can spot immediately if your spacing is jumping wider than it should, or if an arc that was flowing cleanly has suddenly broken. These are the kinds of errors that are easy to miss when you are focused on a single frame, but they become obvious the moment you have context. For complex scenes involving multiple characters or objects in motion simultaneously, that early error-detection is not just helpful — it is necessary.
Key Takeaway: Onion skinning is a motion control system, not just a way to see frames.
Traditional vs Digital Onion Skinning Techniques
The traditional method was beautifully simple: a lightbox, transparent paper, and a steady hand. Animators would lay their current sheet over the previous drawing and trace the shape of the movement, adjusting slightly to advance the pose. There was something tactile and immediate about it — you could feel the physical weight of the layers. Despite requiring physical repositioning of drawings for every reference change, the results — from the Golden Age of Disney to the classic Warner Bros. cartoons — demonstrate just how effectively this method was used to create expressive, precise character animation.
The digital equivalent captures the same principle but extends it significantly. Modern software lets you control exactly how many frames appear as ghosts, adjust their opacity, assign distinct colors to past and future frames, switch to outline-only mode when the detail becomes visually noisy, and toggle the whole system on or off with a single keystroke. You can dial in the exact amount of context you need for a given shot — a tight two-frame window for a subtle facial expression, or a wide six-frame spread to track an entire running stride. The core concept has not changed in a century; the controls have just become far more precise.
Onion Skinning in Animation Software
The core function is consistent across all major animation tools: see where you came from and where you are going, within a single working view. What differs is how each software exposes the controls and how much flexibility it gives you over which frames are shown and how they appear. Understanding the implementation in your own tool is what allows you to move past the defaults and use the feature with real intention.
2D Animation Software
Adobe Animate has long been a standard for 2D digital animation, offering color-coded past and future frames, an outline mode for reducing visual clutter on complex scenes, and adjustable frame ranges on both sides of the current frame. Photoshop's Video Timeline also supports onion skinning for frame-by-frame animation within a compositing workflow many artists already know well.
Beyond the Adobe ecosystem, Clip Studio Paint has become a favorite for its per-layer onion skin controls, TVPaint has built a loyal following in professional studios for its flexibility, and Procreate Dreams brings onion skinning to a touch-based workflow that feels genuinely intuitive once you adapt to it.
3D and Hybrid Software
Blender's Grease Pencil sits in an interesting middle ground — it is a 2D drawing tool inside a 3D environment, and its onion skinning is correspondingly flexible. You can display ghosts based on keyframes only, all frames within a range, or a manually selected set, with visibility controlled per layer — enormously useful when animating a character with separate layers for body, hair, and accessories.
For 3D mesh animation, Blender offers the Onion Skin for Meshes addon, which generates ghosted versions of animated 3D models so you can track how a character's body was positioned in previous frames. Maya addresses a similar need through its Ghost Selected feature for 3D character performance. In stop motion, dedicated software like Dragonframe and Stop Motion Studio overlays the live camera feed with the previous frame capture, turning onion skinning into a physical-world alignment tool.
Key Takeaway: All major animation software includes onion skinning — the core function is the same across tools.
When to Use Onion Skinning: Practical Animation Scenarios
Onion skinning is not a feature you leave running at maximum settings for every shot. Part of using it well is knowing when to dial it up, when to pull it back, and when to turn it off entirely. Different animation types require very different frame ranges, opacity levels, and display modes to be genuinely useful.
Walk Cycles, Lip Sync, and Action Sequences
Walk cycles benefit from a higher frame count — typically four to six frames — because you need to see the full stride pattern and track where the feet make contact with the ground across the whole cycle. Seeing both the back foot pushing off and the front foot landing within the same view is what makes walk cycle onion skinning genuinely informative. For a detailed breakdown of how walk cycles are structured and timed, the RebusFarm guide on Walking Animation Fundamentals covers the four key poses and how they work together.
Lip sync is a different challenge entirely. Mouth shapes shift quickly and the differences between adjacent frames can be subtle, so a lower frame count — often just one or two frames in either direction — keeps the reference tight and readable without creating visual confusion between similar mouth shapes that are meant to be distinct.
Action sequences benefit from a higher frame count to track motion arcs and spacing across fast movements. Seeing four to six ghost frames during an impact, a jump, or a quick camera pan helps maintain consistent arc direction and verify that spacing is producing the intended sense of weight and speed.
Onion Skinning for Stop Motion and Rotoscoping
In stop motion animation, onion skinning solves a fundamental physical problem: the animator has to move a puppet to a new position without being able to see exactly where it sat in the previous captured frame. The software overlay bridges that gap, letting the animator align the puppet precisely before clicking the shutter.
Rotoscoping — tracing over live-action footage to create animation — relies on onion skinning in a similar way, displaying the original video beneath the drawing layer so that each traced frame stays grounded in the actual movement of the reference. Films like A Scanner Darkly (2006), Loving Vincent (2017), and the series Undone (2019–2022) all used rotoscoping as a core visual approach, with frame continuity made possible by exactly this kind of overlay reference.
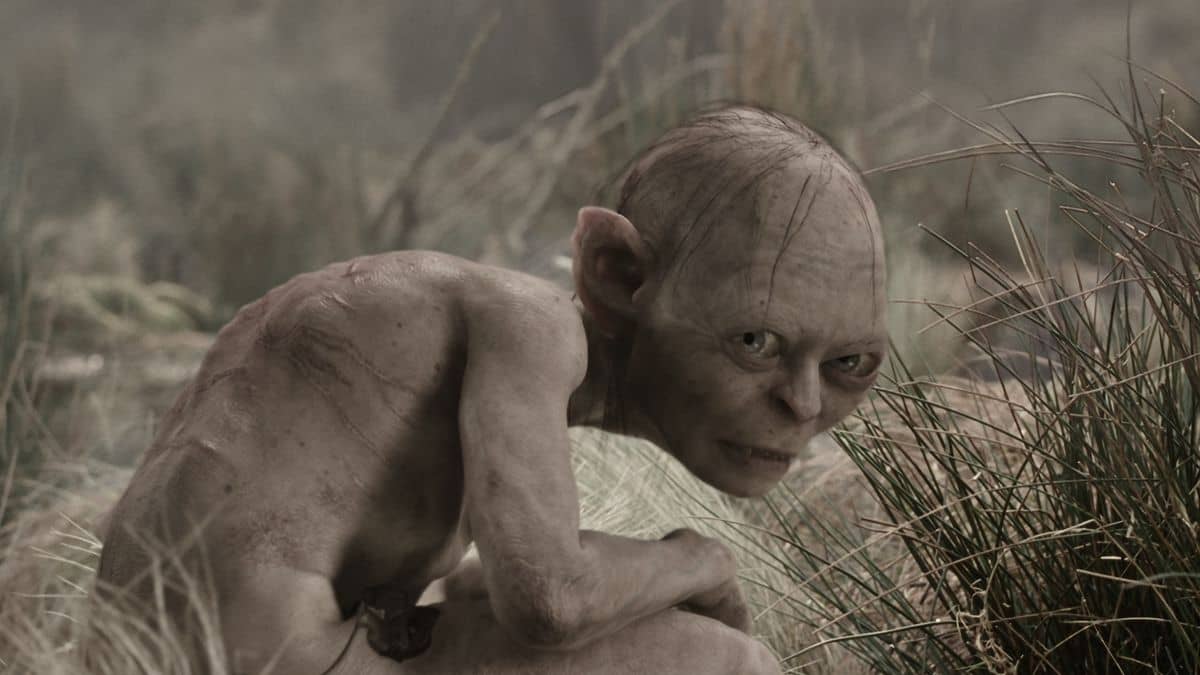
Image Credits: Movienewsnet.com
How Onion Skinning Helps Apply Animation Principles
Onion skinning provides immediate visual feedback on three of the most important principles in animation: timing, spacing, and arcs. Understanding how to read each one from your ghost frames is what transforms the feature from a passive display into an active quality check running throughout the entire animation process.
Checking Timing, Spacing, and Arcs
Timing is about how many frames sit between poses — fewer frames mean faster action, more frames mean slower. With onion skinning, you can count the visible ghost frames between two positions and immediately verify whether the pacing matches what you intended.
Spacing is about the distance between those ghost frames — close ghosts indicate slow, decelerating movement, while wide-apart ghosts signal fast, accelerating action. This visual feedback is invaluable for creating the kind of natural ease-in and ease-out that makes animation feel physically believable rather than robotically linear.
Arcs are the third pillar. Human and animal limbs follow curved paths, and when those arcs break, the animation reads as wrong even to viewers who cannot articulate why. With ghost frames visible, a broken arc appears immediately as a kink or jag in the visual trail — something you can correct long before you have built the rest of the scene on top of a flawed foundation.
Key Takeaway: Onion skinning makes timing, spacing, and arc problems visible before you hit play.
Onion Skinning vs Motion Blur: What's the Difference?
This question comes up often among animators new to the production pipeline, and it is worth addressing clearly. Onion skinning is a creation tool — it exists inside your animation software, visible only to you during production, and it disappears when you export your work. It shows discrete, transparent copies of neighboring frames to help you make better drawing decisions. Motion blur, on the other hand, is a visual effect applied to the finished animation — it simulates the way a camera captures fast-moving subjects and is part of the final rendered output that viewers see.
Onion skinning shows discrete, ghosted frames in the workspace. Motion blur blends frames together in the output to suggest speed. One helps you make the animation; the other helps the viewer receive it. They are not alternatives — they are tools that operate at completely different stages of production. It is entirely normal to use onion skinning extensively during animation, then apply motion blur during rendering. For compute-heavy renders with complex motion blur, cloud rendering services like RebusFarm handle the output efficiently so the artist's time is not spent waiting on machines.
Key Takeaway: Onion skinning helps you create animation; motion blur is an effect applied to finished animation.
Common Onion Skinning Mistakes and How to Fix Them
Displaying too many ghost frames at once is probably the most common problem. When your viewport is filled with overlapping transparent drawings, the reference stops being useful. Starting with two or three frames and increasing only when you genuinely need more context is a better default. Conversely, displaying too few frames means you lose the motion context you need — for walk cycles and action sequences, four to six frames is typically the right range.
Ignoring color coding is another habit worth breaking. Most software lets you assign one color to past frames and a different color to future frames. High-contrast options — blue for past, red or green for future — make it immediately clear which direction you are looking in time, which matters more than it sounds when you are deep in a complex sequence.
Using the same settings for every scene is a subtle but real trap. A delicate lip sync and a high-energy action sequence have completely different needs. Adjusting your onion skin configuration at the start of each shot pays off in clarity and speed. The same applies to opacity — lowering it slightly on busy scenes prevents the ghost frames from competing visually with the current drawing.
Finally, periodically turning onion skinning off and viewing your current frame in isolation is genuinely important. You can become so accustomed to the ghost overlay that you stop seeing your own drawing clearly. And always scrub through the timeline to check actual playback — no amount of ghost frames can fully replace the experience of watching your animation move.
Frequently Asked Questions.
What is onion skin in animation in simple terms?
Onion skinning is a feature that shows faded copies of nearby frames alongside your current frame, helping you see where your character was and where they are going so you can draw smooth, consistent motion. It is like being able to see through the page to the drawings underneath — so you always know where the character just was and where they are heading, without switching between frames manually.
Does onion skinning work for 3D animation?
Yes, though the implementation varies. Blender's Grease Pencil has robust onion skinning built in with multiple display modes. For 3D mesh animation, Blender's Onion Skin for Meshes addon generates ghosted versions of the animated model at surrounding frames. Maya's Ghost Selected feature provides similar reference for 3D character animation. Beginners exploring Blender can find a useful starting point with the RebusFarm guide on How to Use Mixamo with Blender: Full Beginner Guide.
How many onion skin frames should I display?
It depends on the type of animation. Walk cycles and action sequences typically benefit from four to six frames of context. Lip sync work is often clearest with one to two frames on each side. Subtle transitions — head turns, blinks, small weight shifts — may only need a single reference frame. Adjust the range per scene type rather than leaving it on a fixed setting across the entire project.
Can I use different colors for past and future frames?
Yes, and doing so is strongly recommended. Most software allows you to assign distinct colors to past and future ghost frames. A common and effective combination is blue for past frames and red or green for future frames, making the direction of motion immediately readable without needing to count frame numbers.
Is onion skinning useful for beginners?
Very much so. For beginners, onion skinning provides spatial feedback that helps develop an intuitive sense of timing and spacing — skills that would otherwise take years of practice to build from playback alone. Starting with a simple two-frame range on each side is usually enough context to make early animation work significantly cleaner and more consistent.
Does onion skinning affect rendering or playback performance?
Onion skinning is a workspace display feature — it has no effect on the final render output or file. It may slightly affect real-time playback performance in complex scenes with many visible ghost frames, but reducing the frame range while working on high-complexity scenes is a practical way to manage any performance impact without losing the tool's usefulness during production.
Onion Skinning in Animation — Key Takeaways.
Onion skinning is one of those techniques that rewards animators who use it deliberately over those who simply leave it switched on. Understanding what each ghost frame tells you about timing, spacing, and arc direction is what transforms it from a passive display feature into an active part of the animation process.
The most important habit to develop is treating the frame range and settings as adjustable tools rather than fixed defaults. What works for a walk cycle will not work for lip sync, and both differ from what is useful in a fast action sequence. Adapting the configuration to each type of scene is what makes onion skinning genuinely productive rather than just visually busy.
Whether you are working in traditional 2D, Blender Grease Pencil, stop motion, or anything in between, the underlying goal remains the same: see enough of where you have been and where you are going to make informed decisions about where you are. That goal has driven animation practice for nearly a hundred years, and onion skinning — digital or physical — is still the most direct way to achieve it.
Thank you for reading this guide. We hope it has given you not just a clearer understanding of what onion skinning is, but a more practical sense of how and when to use it within your own workflow. The technique is simple in concept and surprisingly deep in application — and the animators who understand it well show it in the smoothness and intention of every sequence they produce.
Kind regards & Keep rendering! 🧡

About the author
Vasilis Koutlis, the founder of VWArtclub, was born in Athens in 1979. After studying furniture design and decoration, he started dedicating himself to 3D art in 2002. In 2012, the idea of VWArtclub was born: an active 3D community that has grown over the last 12 years into one of the largest online 3D communities worldwide, with over 160 thousand members. He acquired partners worldwide, and various collaborators trusted him with their ideas as he rewarded them with his consistent state-of-the-art services. Not a moment goes by without him thinking of a beautiful image; thus, he is never concerned with time but only with the design's quality.
![]()
![]()
![]()
![]()
![]()
