Friday, September 29th, 2017 by Miloš Belanec
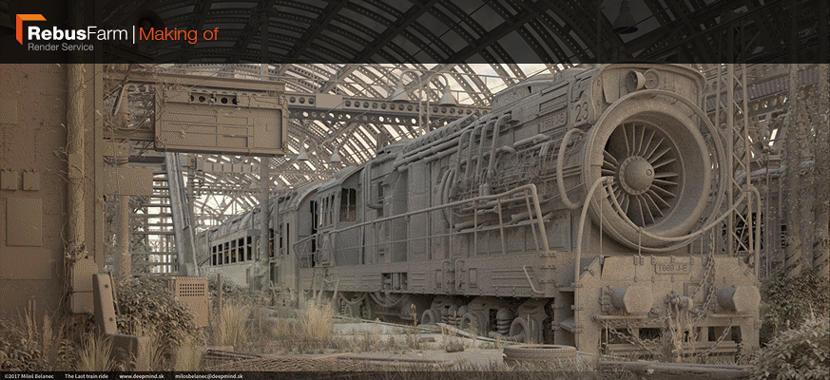
It's not the end of the line for our October 2017 3D Artist of the Month yet, as Miloš Belanec went the extra mile to provide an exclusive making of his winning image, ‘The Last Train Ride’. Join us on an express ride through the intricate rail system of the mind of one of Slovakia's up-and-coming digital artists, as he walks us through the creation process of his latest work. Next stop: Imagination.
 Miloš Belanec
|
Hi everybody, my name is Miloš Belanec, I’m a 23 years old self-taught 3D generalist, concept and texture artist. Together with two good friends I own and operate a small studio called DeepMind in Bratislava, Slovakia, where I live with my girlfriend and my pet mantis Dexi. Today, it’s my great pleasure to detail the creation and development process of my latest personal project ‘The Last Train Ride’ for you, the readers of the RebusFarm blog. So without further ado, let’s jump right into it! |
Overview
First of all I want to point out that I approach my personal projects very differently than the commercial ones: I work in a much looser way, the progress is more spontaneous and there are always several ideas I’m developing simultaneously: a few studies here, a quick concept there – you get the idea.
‘The Last Train Ride’ took around two months to complete and was created using 3DS Max. The surroundings were edited with Zbrush, textures were done in Photoshop and I used the Vray plugin for rendering.
Concept
That said, I got the initial idea for ‘The Last Train Ride’ when I spotted an old, worn out T669 locomotive at Žilinas station while travelling. It was really massive and I immediately imagined a big turbine as part of it. I’ve always been fascinated by old trains and planes. To me, they’re these giant, powerful pieces of metal machinery that, at the same time, indicate the passing of time in a peculiar way.
Aesthetically speaking, I draw a lot of inspiration from outdated technology, abandoned places and sci-fi in general, so it’s not surprising the T669 left a lasting impression. As soon as I returned to Bratislava, I sat down and made a rough sketch, consisting only of the basic shapes without any textures or details.
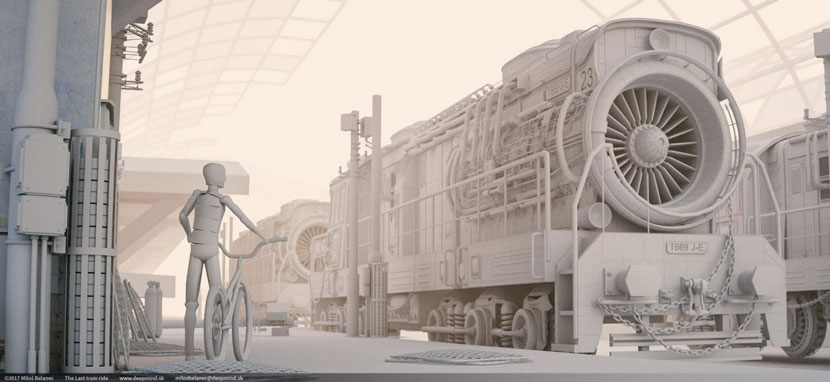 'The Last Train Ride', first sketch
Models
After I finished the rough draft, I started gathering reference material including actual blueprints found online. Following my thought process upon first seeing the locomotive, I added a turbine inside the machine. That gave the scene a nice cyberpunk feel, but it still seemed kind of dull and too clean for my liking. So I went all crazy on the details, adding features such as suction systems, electromagnets, hoses, tubes and pipes, with no regard of functionality.
Next I made the basic wagons. They’re not particular important to the scene, as I wanted to focus more on the environment as a whole.
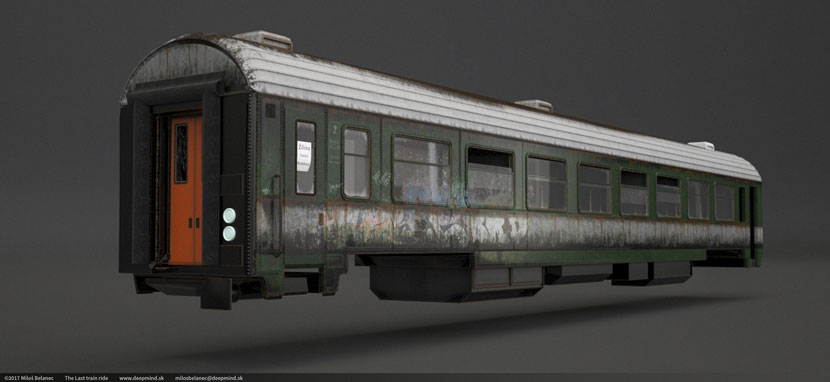 Model of a basic wagon
For the actual building, I wanted to pay homage to Prague main railway station by making something similar to its open construction. Of course I didn’t want to simply replicate the entire building, so I combined elements of a station and a depot.
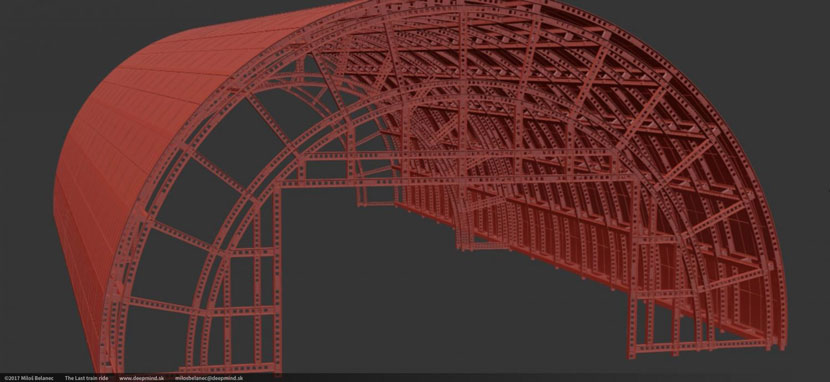 The architecture of the building is inspired by Prague main station
Details
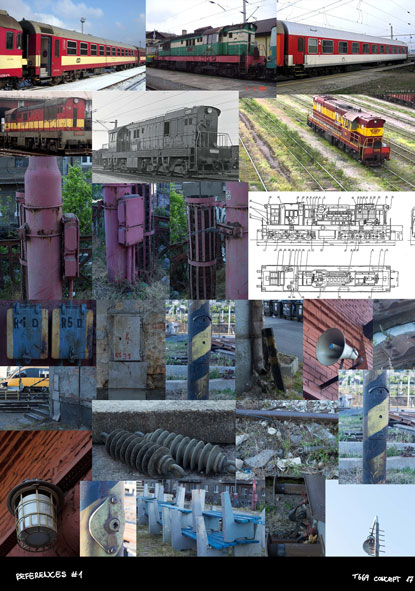
Although I generally think that, in terms of visual design, artistic vision is inherently more suitable for these type of projects than a photorealistic approach, I still aim to create a believable scene. So to get a better understanding for the surroundings I was trying to emulate, I turned off my PC, took my camera and visited a lot of train stations. I made small studies of anything that caught my eye, from plants growing besides tracks to loudspeaker systems.
 |
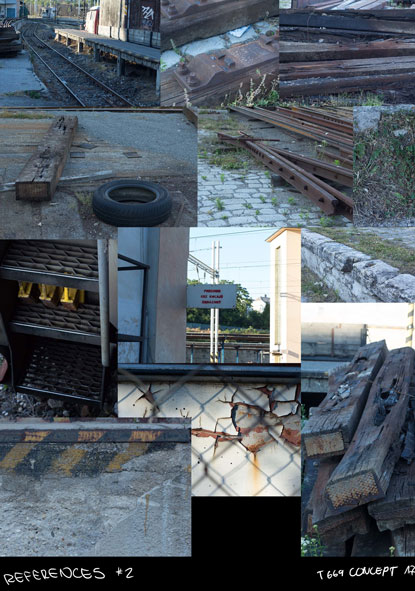 |
Reference material gathered on field trips to various train stations
The hardest part about implementing these objects into the image to me is striking just the right balance between too much and too little detail: Cluttering the scene means diverting the viewer’s attention from the locomotive as the main focal point, whereas doing the opposite just makes it appear empty and barren.
Textures
Attention to minor details such as rivets, welding points or cracks in the paint goes a long way in setting the mood, so I needed textures that properly conveyed the post-apocalyptic look I was going for. Since I’m somewhat obsessed with creating and sharing my own materials, I used original textures for this project.
You can find all of my texture packs available for download on my Gumroad.
Lighting and Render
Lighting is even more important in creating a specific atmosphere, as it evokes an immediate emotional reaction. Is it in the early morning, on a sunny day or stormy evening? I need to try almost every possible scenario to see which one fits the best. Using the wrong lighting not only easily undermines all the work I put into the small details, it also heavily reduces overall appeal!
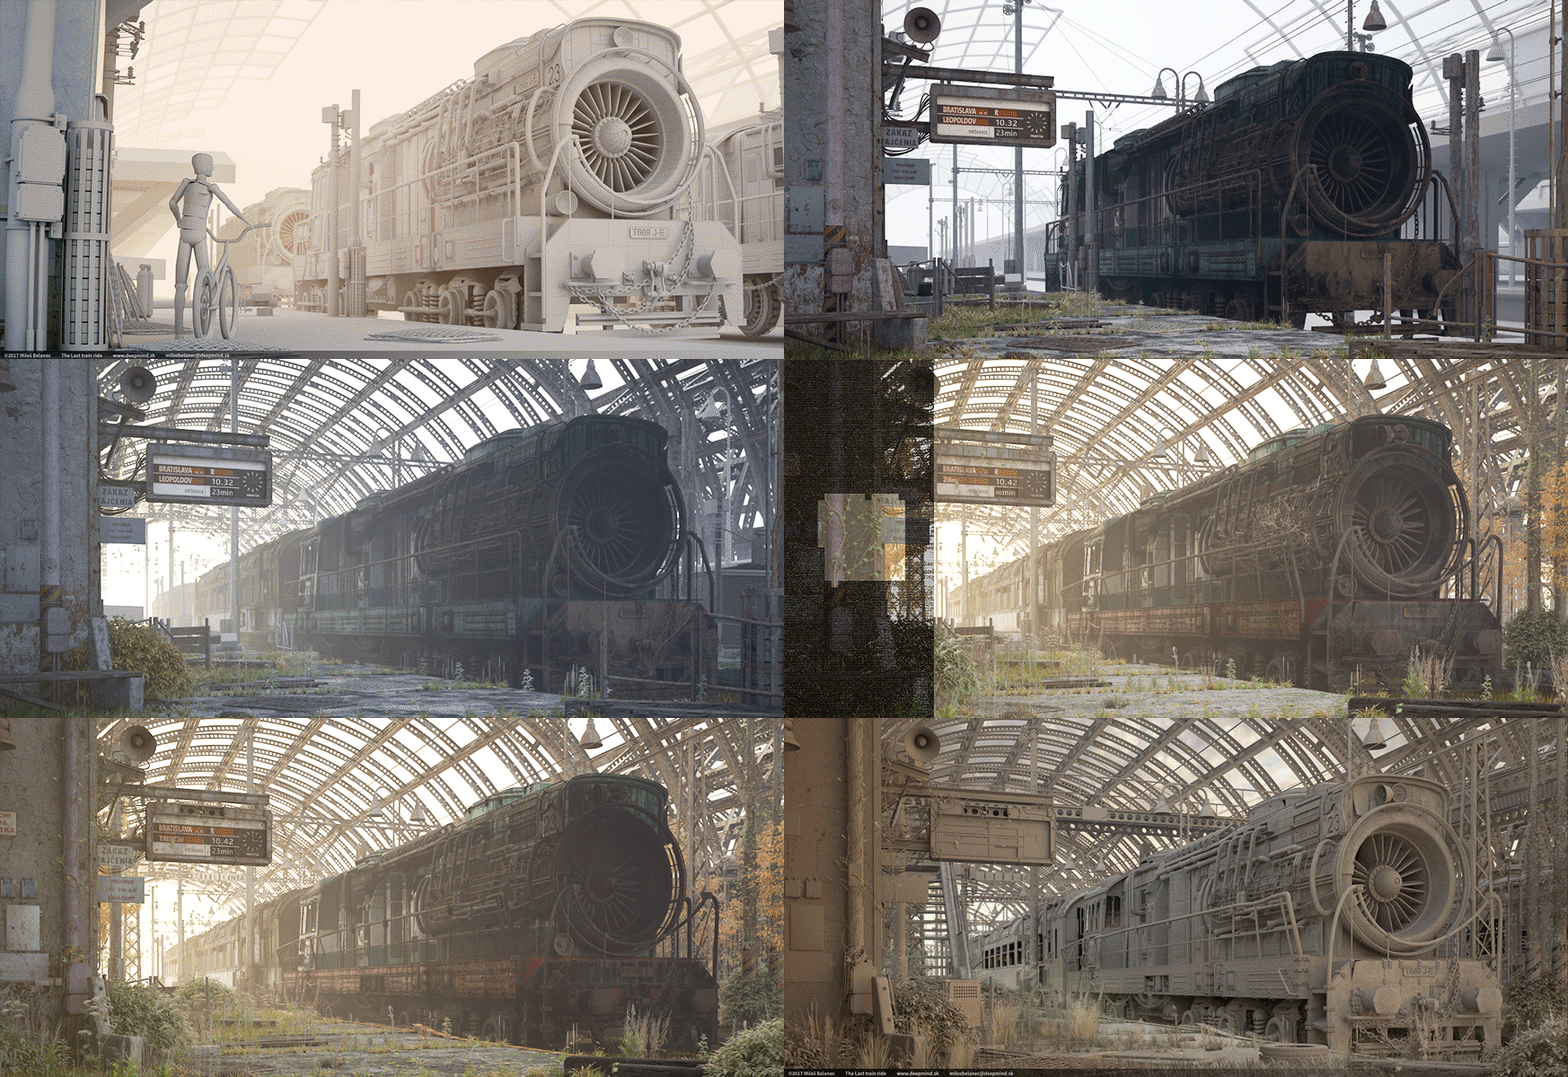
Once I’ve found my desired light conditions, tuned the materials and set up a camera angle, I’m finally ready to start rendering. For ‘The Last Train Ride’, render took about 6 hours and 160 gigabytes of RAM, mainly because of the details for displacement. The whole process is summarized in this short gif:
 Render process
Post Production
Last but not least is post production. I personally prefer Photoshop, but there’s also another software called Nuke which I think is pretty good. I added chromatic aberration, a bit of steam and final coloring to achieve a more realistic look.
I tended to experiment with coloring a lot, in the past I had at least 30 color variations for each of my projects. However, I’ve been trying to maintain a similar style for the majority of my latest works, because I think the visual style should be like the signature of the artist.
I’d like to thank the entire staff at RebusFarm for giving me this opportunity to showcase my work.
Thanks for reading.
- Miloš
If you want to learn more about the artist behind the image, be sure to check out our portrait of the RebusFarm 3D Artist of the Month!
If you enjoyed his article, reach out to Miloš and let him know:
HOW TO JOIN OUR MONTHLY CONTEST
You want to be our next featured 3D Artist of the Month and win 250 RenderPoints? Just visit our 3D Artist of the Month competition page and submit your entry. We'll choose the best image and contact the winner.
