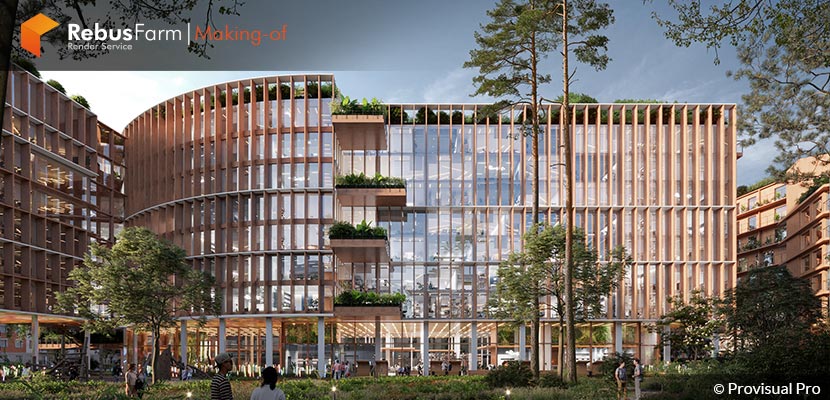
Short deadlines are something we can face very often in architectural visualization projects. Nevertheless, keeping high quality is something that definitely needs experience and a well-organized workflow. Alexander Suharukov from Provisual Pro shows us the way he handled this architectural competition in which many different companies were involved. Enjoy!
About me.
Hello everyone!
My name is Alexander Suharukov. I currently live and work in Poland. I am an architect and 3D artist with over 10 years of experience in 3d visualization. In 2017, I founded my own 3D visualization studio - Provisual.pro. I would also like to thank the RebusFarm team and VWArtclub for the chance to talk about the process of creating the Boulogne project. I hope that my shared experience will be useful to you.
About the project.
BOULOGNE PROJECT.
Client | A2M
Location | Paris, France
Year | 12.2021
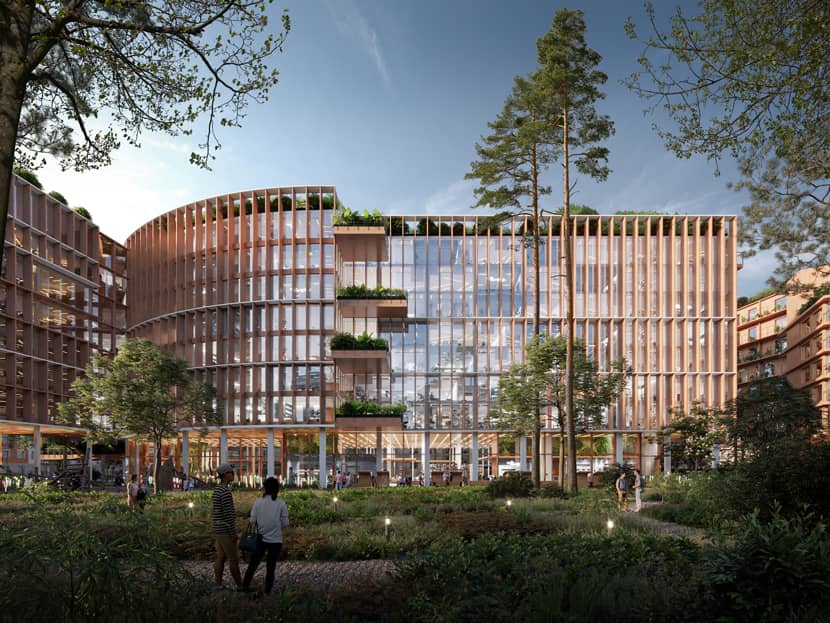
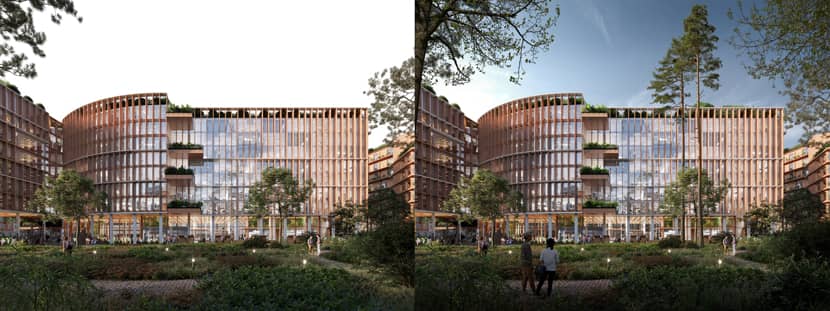
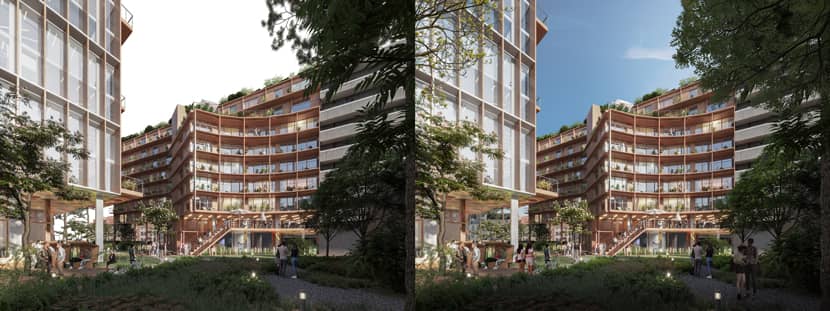
The Boulogne project is a contest project for the renovation of Renault headquarters in Paris. The building consists of offices and retail spaces. The total area of the premises is almost 30,000 m². This architectural contest involved the efforts of a large team of professionals such as A2M, Atixis, Agence Babylone, Art acoustique, RLB-SQA, Crea-Tec, Sureal, Rotor, AxCe sécurité, and BTPP.
Renderings were created in collaboration with the Belgian architecture bureau A2M and the French landscape architecture bureau Agence Babylone. The project was very urgent. It took us 8 days to create the renderings and photo montage since we got the working files from the architects to make the final renderings.
Software & Hardware used.
I used several software on this project. Most of the work was done with 3DS Max 2019, Corona Renderer, Itoo Software (Forest Pack + RailClone), and post-processing in Adobe Photoshop CC. I also used additional plugins like Sigershaders, Corona Materials, and FloorGenerator.
Computer Hardware: AMD Ryzen 9 3950X 3.5 GHz 16-Core, NVIDIA GeForce GTX 1070 Ti, RAM 64GB, 2x Dell u2412m.
Modeling.
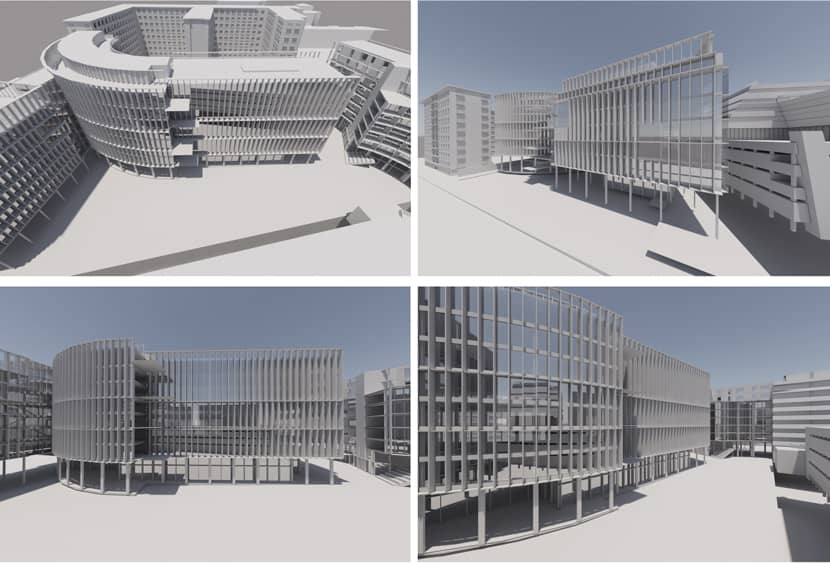
The original building model was provided by the architect. This model required significant revision, since it seemed good at first glance, but lacked such details as balcony railings, slab thicknesses, etc.
Composition.
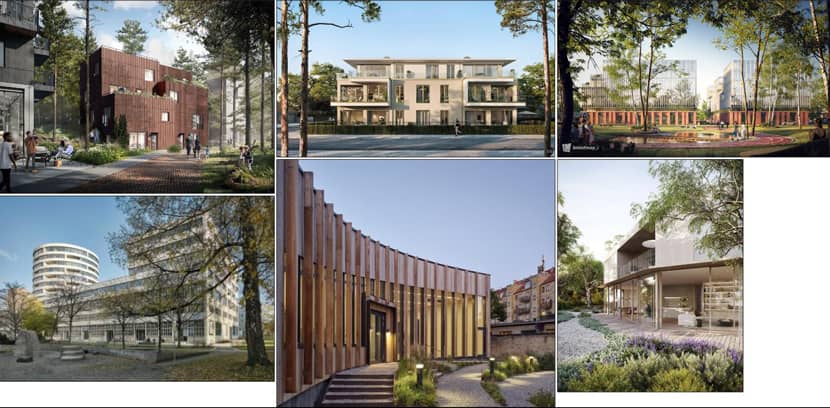
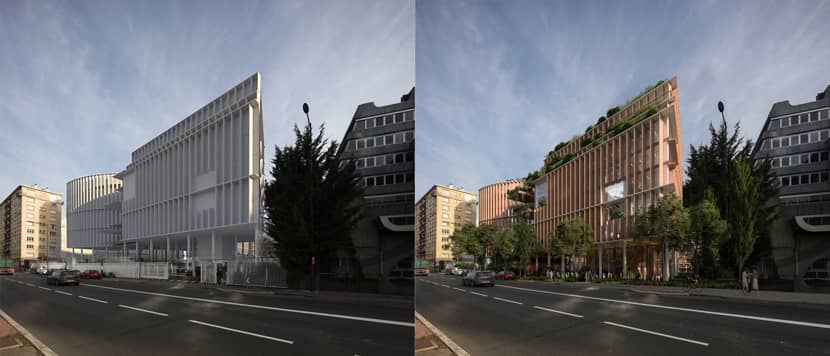
Applying polygonal modeling and RailClone modeling on the model, we got some results to work with. I proposed several options to the architect regarding camera views with basic lighting for the clays (White renders). The architect chose the camera views, so I proceeded to work on the renderings.
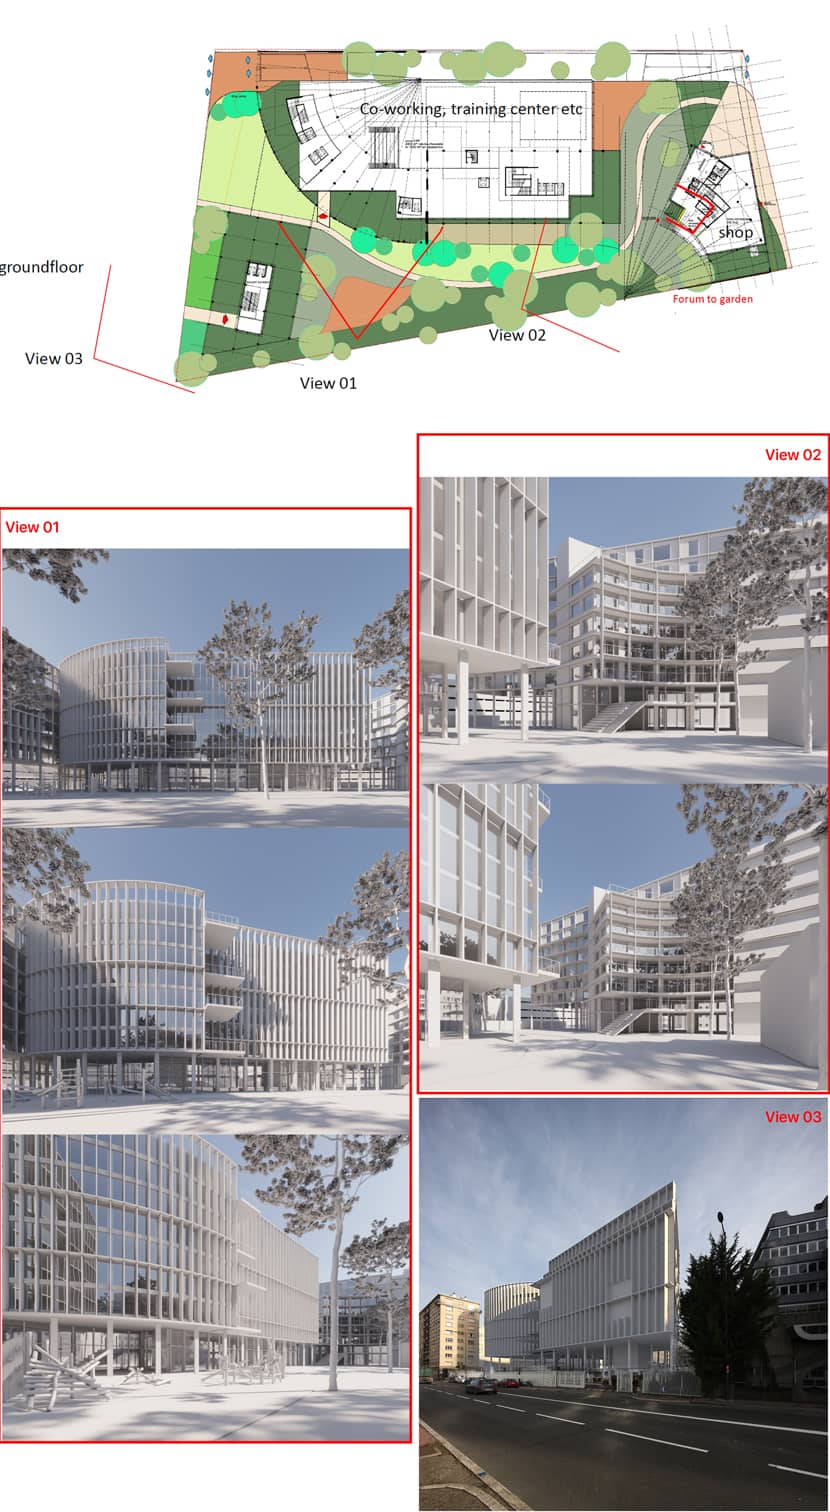
The rendering references were found on the Internet and on Behance.
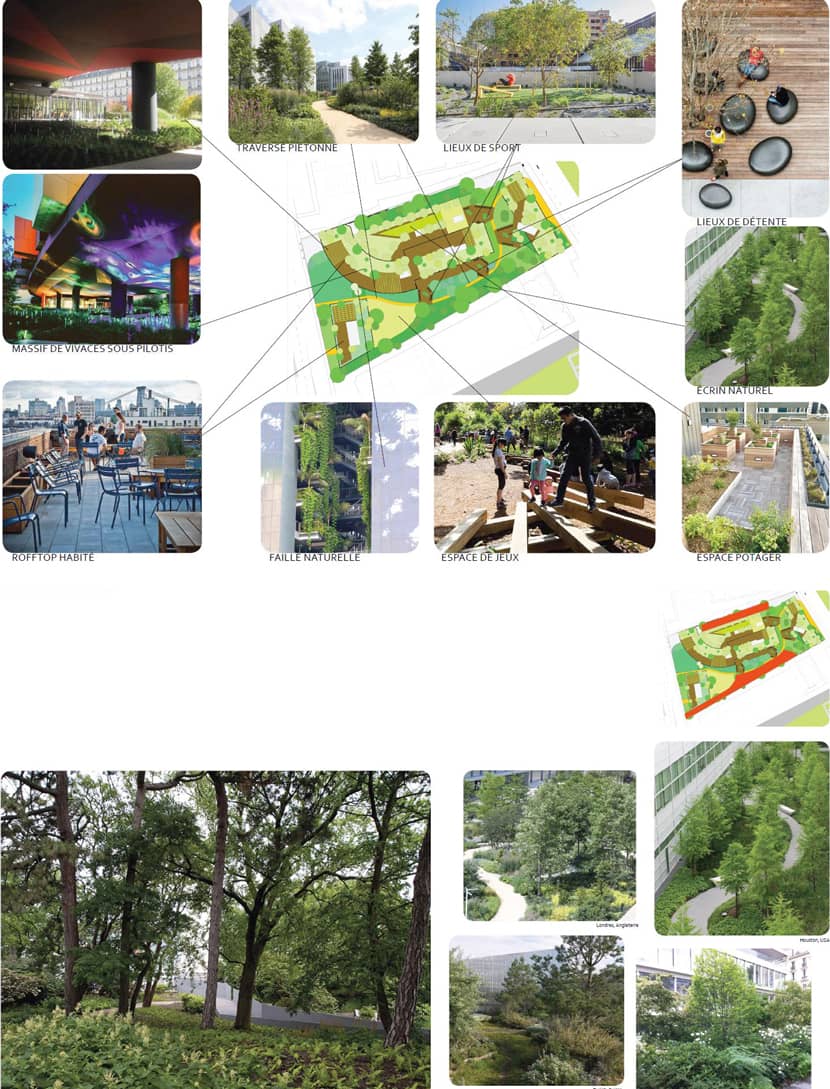
The landscape architect's task also included the external appearance of the green area and small architectural forms.
Materials & Lighting.
As for the materials, there is nothing out of the ordinary. The Sigershaders corona material and Corona Material Library solve the main problems. Sometimes I use Quixel Megascans and Poliigon, but this project didn't need these kinds of textures.
Standard Corona Sun + Corona Skylight and interior lighting in Corona Light and OSL Window shader. I will reveal more details about it later.
The main materials are glass and wood and you can see their settings below. Glass with Noise on Bump and Sigershaders Wood with CoronaRoundEdges on Bump and Color correction on Diffuse. CoronaRoundEdges proves to be a great tool when the model geometry isn't good and you need to make a fake Chamfer.
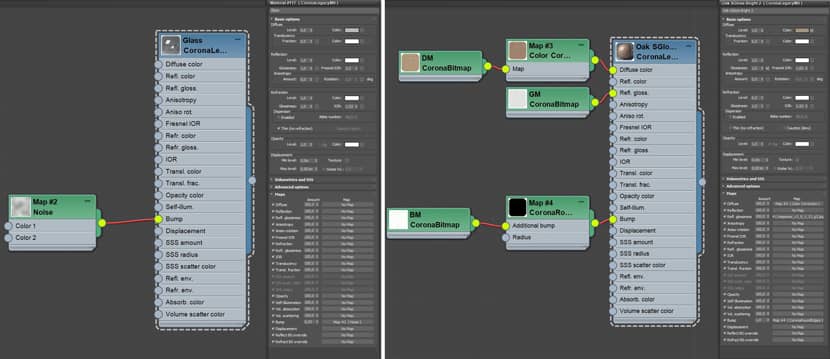 Click on the image to enlarge it.
3D Models & Plants.
The Forest Pack is a great tool for working with plants. In this project, I used several types of plants from the Maxtree collections, as well as the standard ones from the Forest Pack (grass and gravel). I used the Clusters planting method in the Forest Pack to get the plants grouped by species.
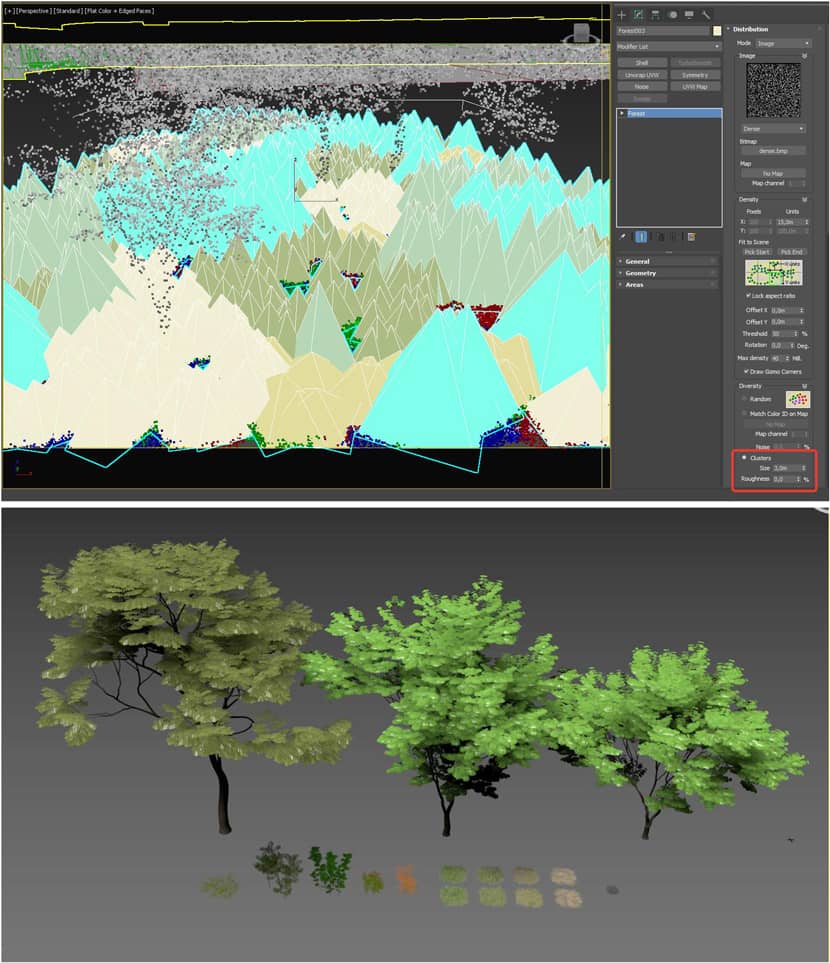 Click on the image to enlarge it.
This is an old tutorial but it shows very well how Clusters feature works:
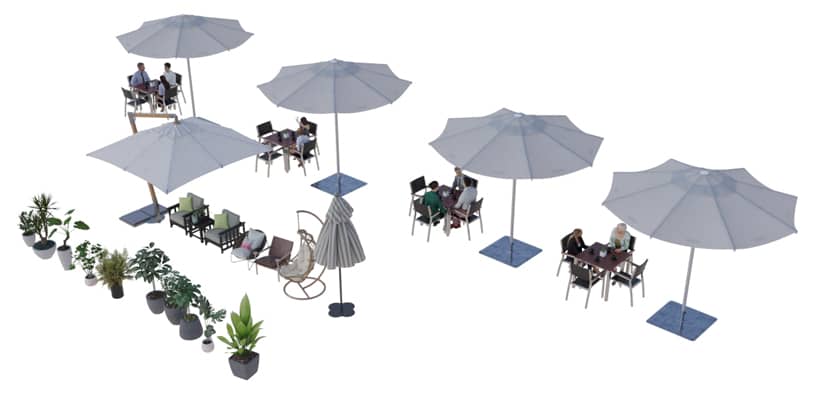
Models from Maxtree, Evermotion, and Corona Scatter were used to fill balconies and terraces. Chairs, umbrellas, and other stuff are from 3dsky (3ddd) and Evermotion. 3D models of people are taken from various collections.
Interiors, OSL Window Shader.
The interiors in the buildings are made with a Low poly office interior model with 3dsky (3ddd) and OSL Window shader. OSL is a great tool to get fast and high-quality results with no extra polygons. In OSL I corrected the color and added Corona material (self-illumination).
 Click on the image to enlarge it.
Below is a pretty nice tutorials explaining how to use Parallax OSL to create Interior in one polygon:
Post-Production.
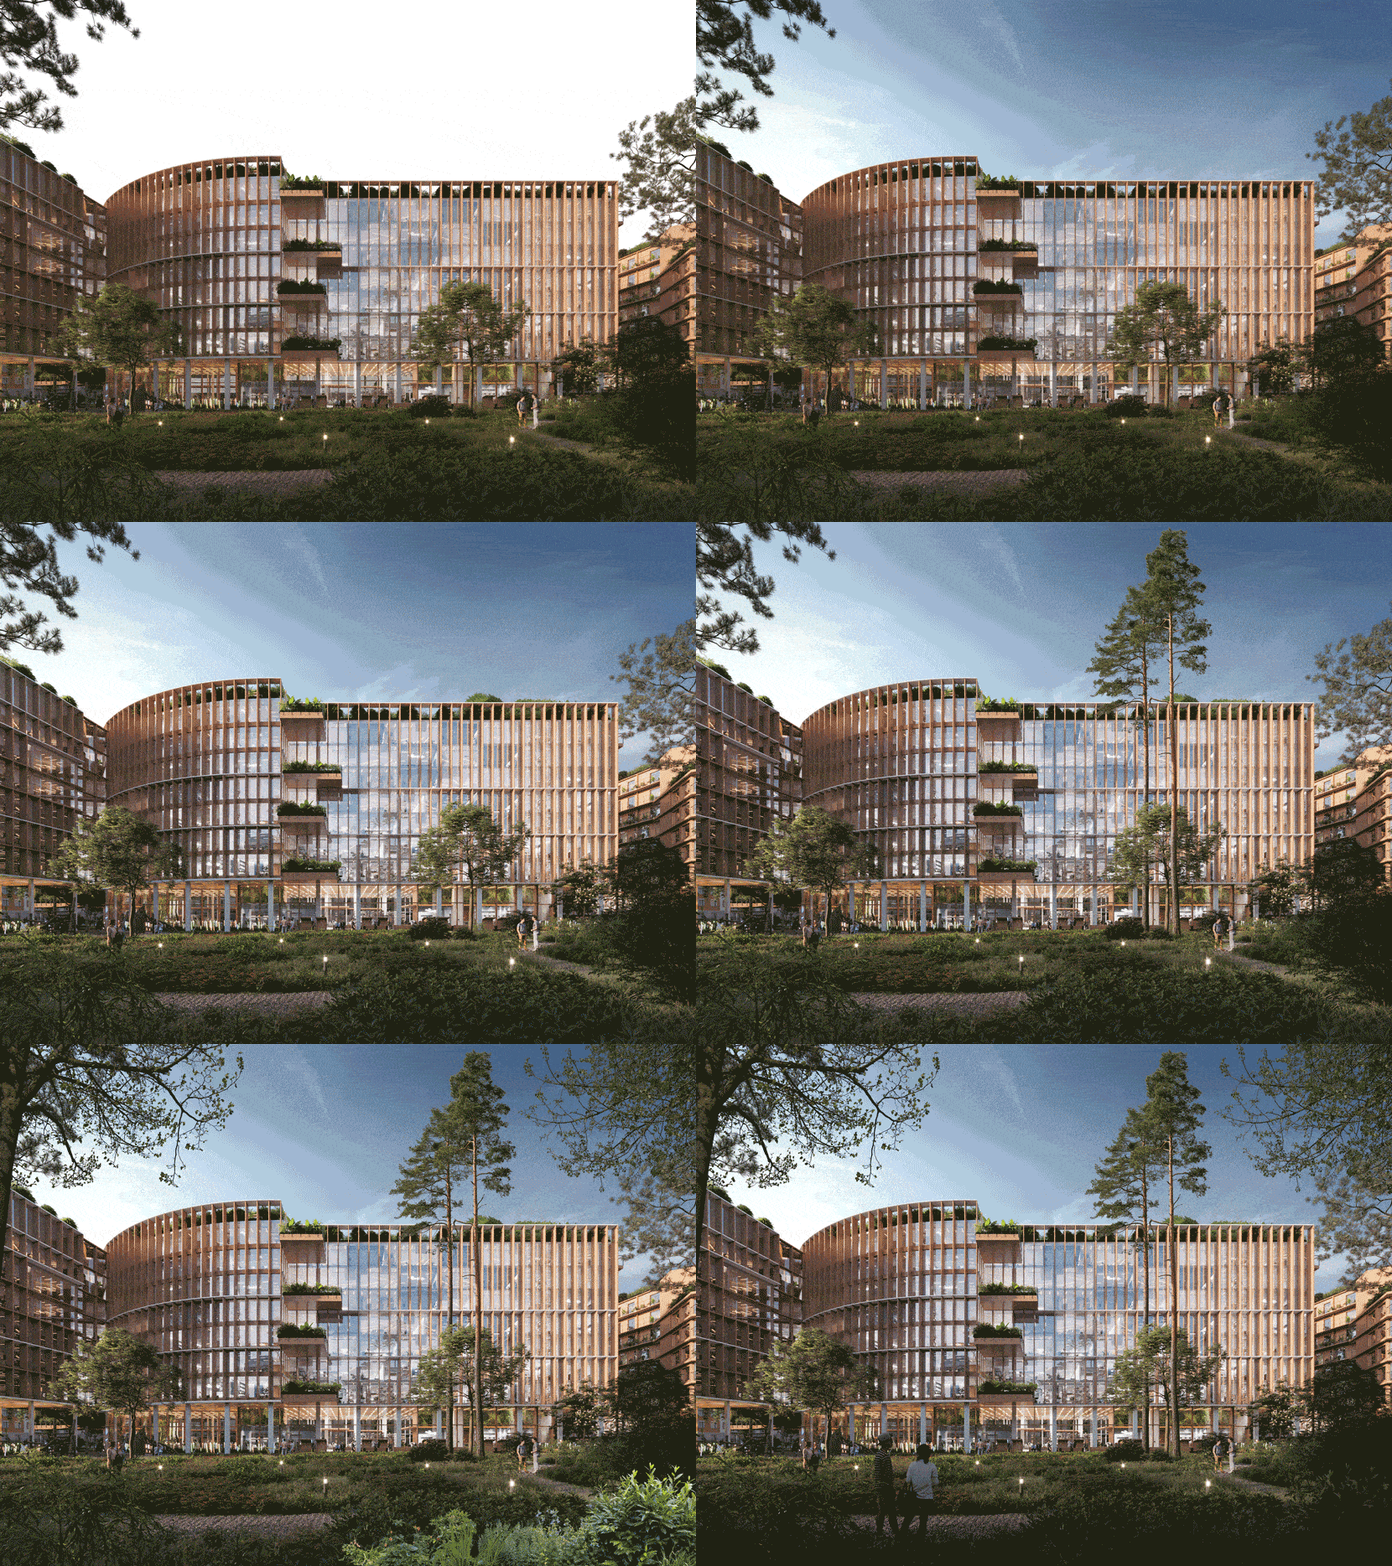
Most of the post-production involved adding plants to the foreground, 2D people (cutout.cloud), and color correction. I prefer to use the people and plants 2D cutout in the foreground.
The standard 3ds Max tool, Perspective Match, and Adobe Photoshop CC were used to adjust the camera in the photomontage.
Thank you for your attention and I hope you enjoyed the article!
With kind regards,
Alexander Suharukov
Check more of Alexander's work on these channels:
Want to share your work with our community too?
Contact us at Этот адрес электронной почты защищён от спам-ботов. У вас должен быть включен JavaScript для просмотра. and tell us about your favorite project.
