
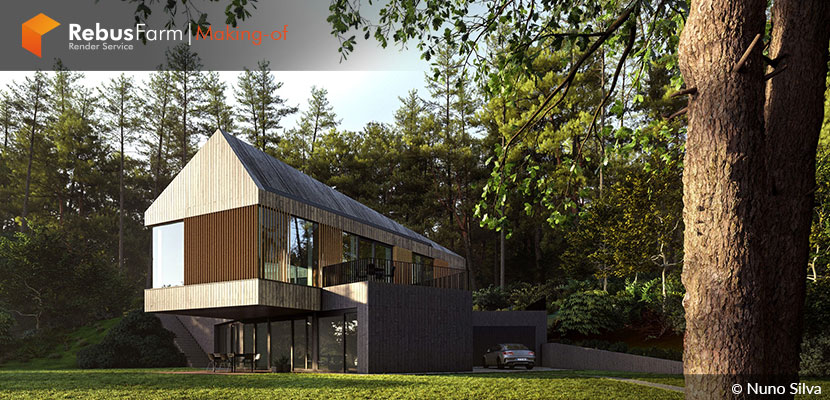
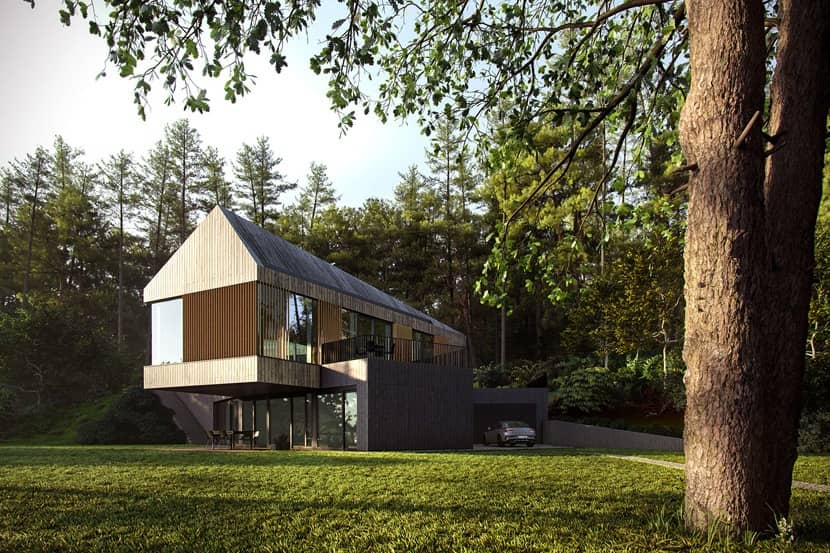
"Valley Villa" by Nuno Silva exemplifies the art of architectural visualization, blending creativity and technical skill to transform visionary concepts into stunning visuals. This article explores the process behind creating pleasant imagery highlighting the design decisions, rendering techniques, and storytelling elements that bring this architectural piece to life. Enjoy!
About me.
Hello,
My name is Nuno Silva, and I'm a 3D artist specializing in architectural visualization. I've been working as a 3D artist for 10+ years, and in the last few years, I've mostly focused on architectural renders. Over the years, I've been blessed to work from my home office in Portugal, doing projects for dozens of long-term clients worldwide. I created 3D renders for buildings built and sold in Canada, the USA, Portugal, and other countries.
I am committed to helping you build your career on your terms and become a successful professional in 3D rendering. I have taught thousands of students online through my free videos and paid online training on my channel, aiming to guide you from a beginner to a professional in architectural rendering. I regularly share step-by-step video tutorials, tips, and tricks to make your renders more realistic and save you time with an optimized working process.
About the Project.
In this tutorial, you will learn how to create the Valley Villa project in Lumion. Here are some of the topics I'll be covering:
- How to use real-world references
- Use OSM satellite maps for landscape
- Basic terrain modeling and adjustments
- Adding an image overlay as a guidance
- Creating two levels of soil/grass for better details
- Adding Materials from Lumion library
- Creating layers for better organization
- Using tools such as cluster or line placement for the vegetation
- Where to get and add HDR images
- What are LUT profiles and how to use them
- Add humanization with Lumion library objects
- Adding a person with a motion blur
Software Used.
The project was created completely in Lumion!
References.
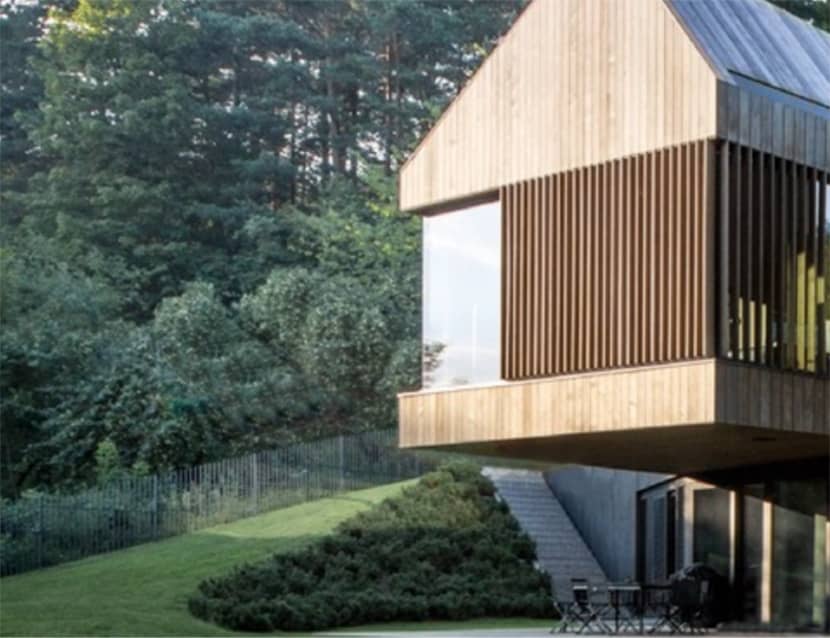
As with every project, I begin by gathering references. First, I loaded all the project images I could find inside PureREF, which lets you copy and paste all the reference images you find online.
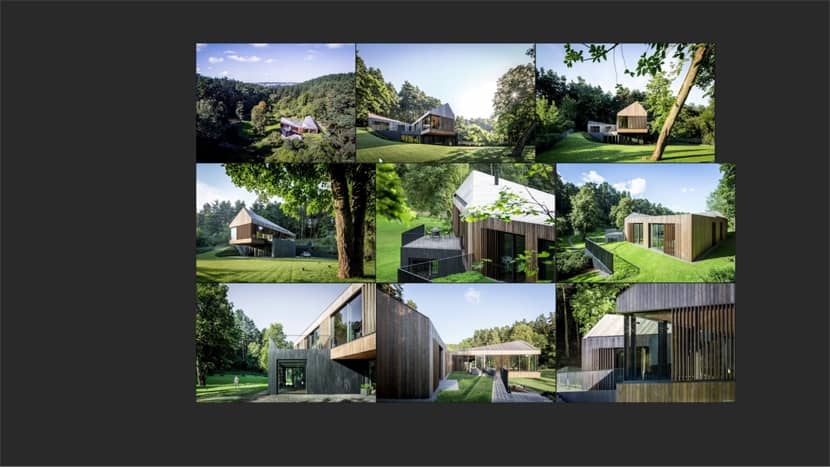
We can see that this house sits on a valley area, just outside Vilnius, Lithuania.
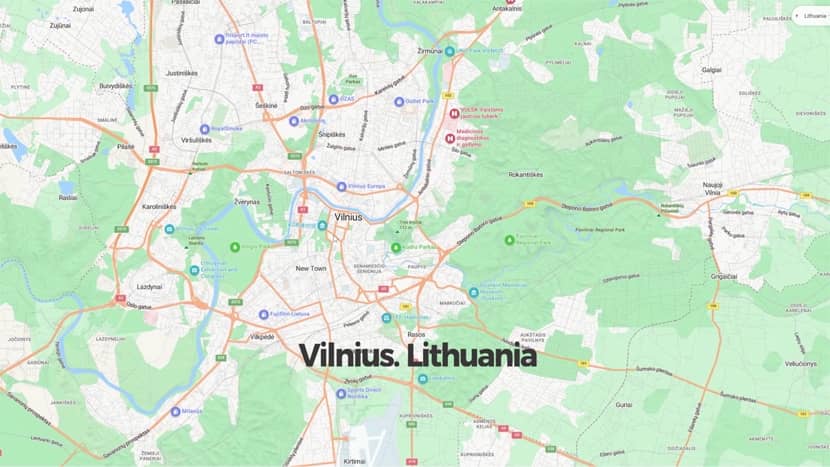
Lumion has OpenStreet Maps built into the terrain editor, which you can use to pull in real-life locations, such as satellite imagery or height maps.
So, I went to Google Maps to find the Valley Villa house location. And well, let me say, it took longer than expected! It was like finding a needle in a haystack, but after some time looking at one of the photos from a city view and trying to place my camera in the same position on Google Earth, I finally found the house location.
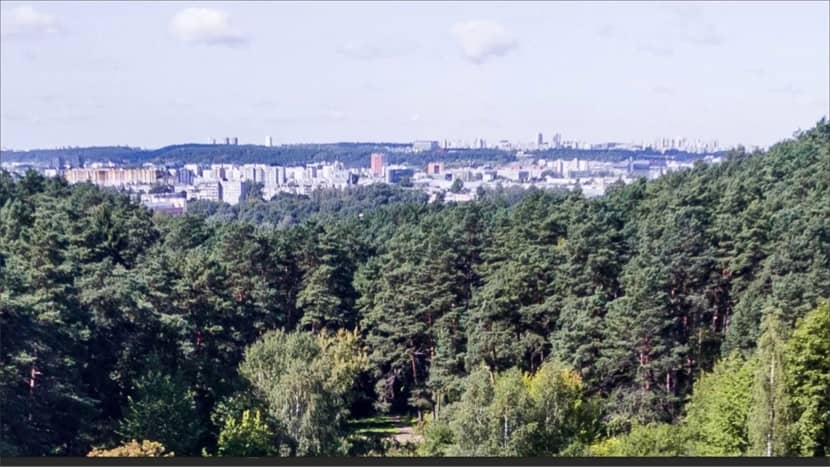
Photo from the house location. Now, you can simply right-click and copy the location!
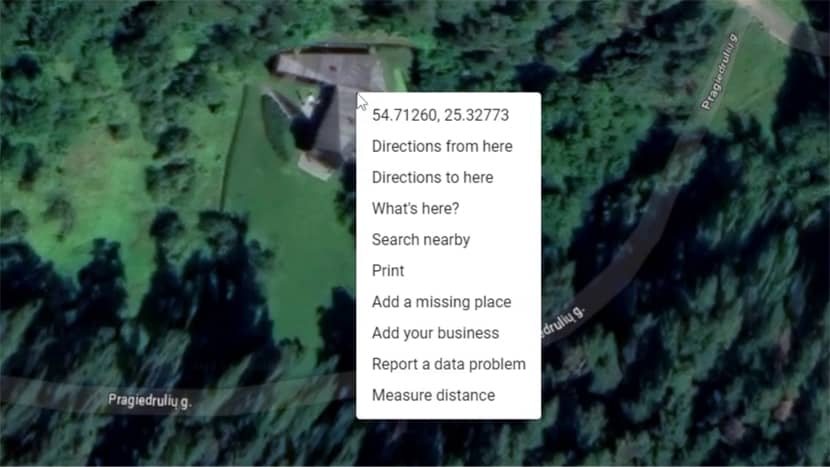
Then in Lumion OSM, you can paste this location.
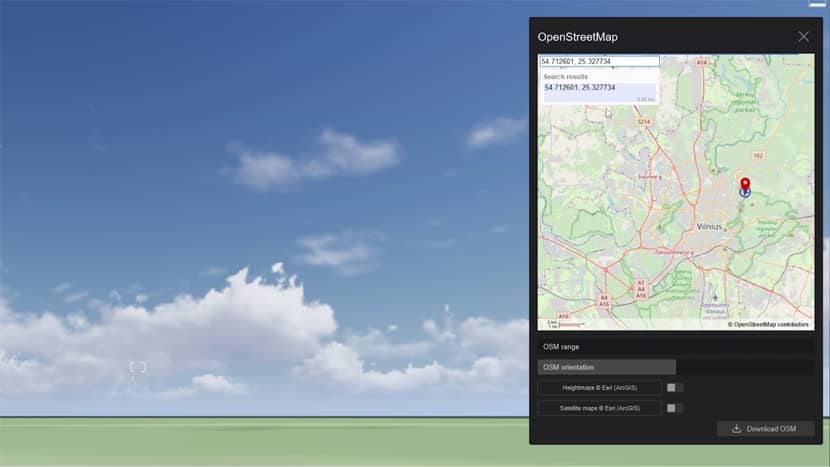
Here, I'll leave the OSM Range to 500m; we don't need more than that for this project, and I'll select these 2 options to download heightmaps and satellite maps. Then press 'Download'.
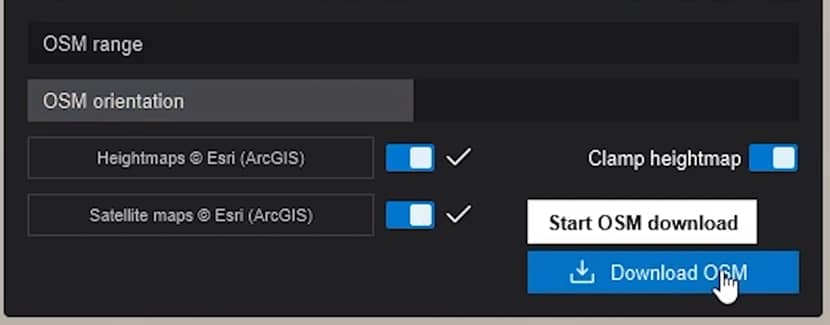
Give it a few seconds to download everything, and you will be prompted to do this.
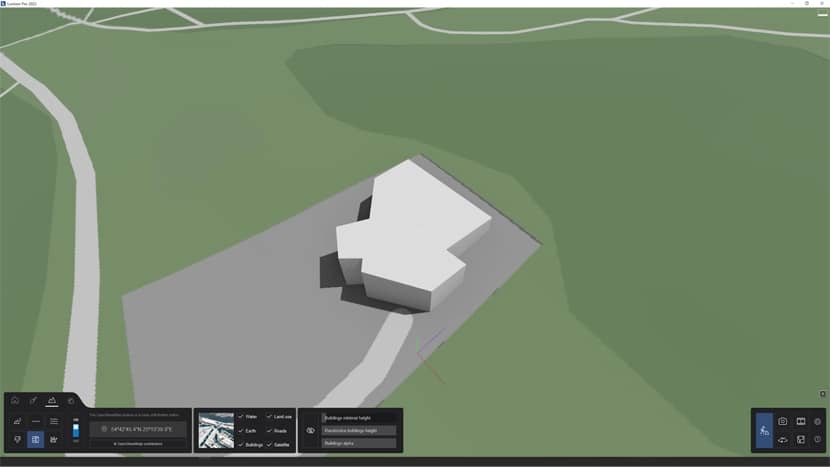
Now, inside Lumion, disable water, earth, buildings, land use, and roads and leave only satellites. We are left with the height map of the real-world terrain and the satellite images.
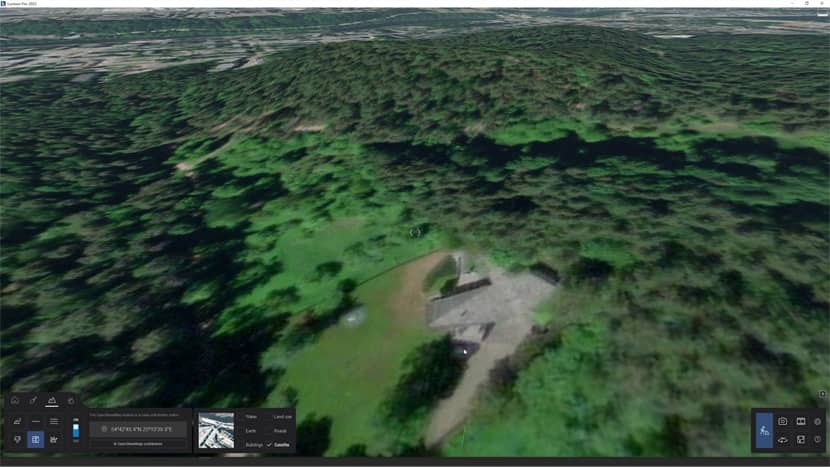
This will help to know where to place trees and bushes and the exact place of the house.
You can see that some areas of the Lumion terrain are coming through the model.
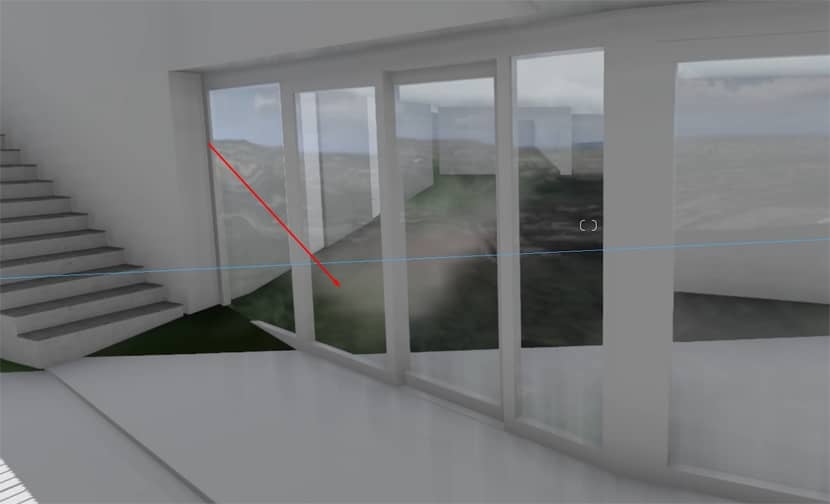
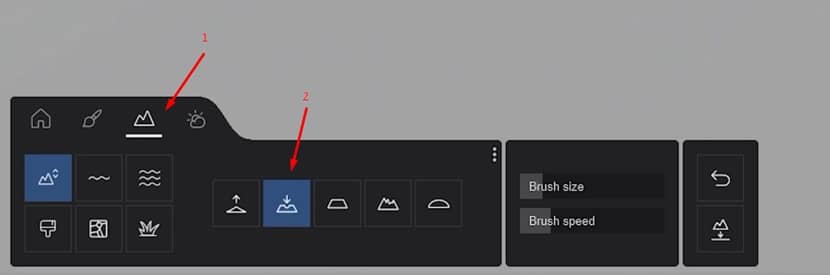
To fix this easily, click on Landscape (1) and select the first icon called Height.
Now, selecting the option Lower (2) allows you to quickly lower some areas of the terrain coming through the 3D model.
Camera.
After setting the terrain and house in place, I will first set up my camera position and aspect ratio.
This way, you can focus only on the visible areas of the camera; we don't need to waste time on areas that we know won't be seen in the final render.
First, I'll use the effect of a Two-Point Perspective so my vertical lines are all parallel. And since I want to replicate the view from this photo, I'll use an effect called Image Overlay.
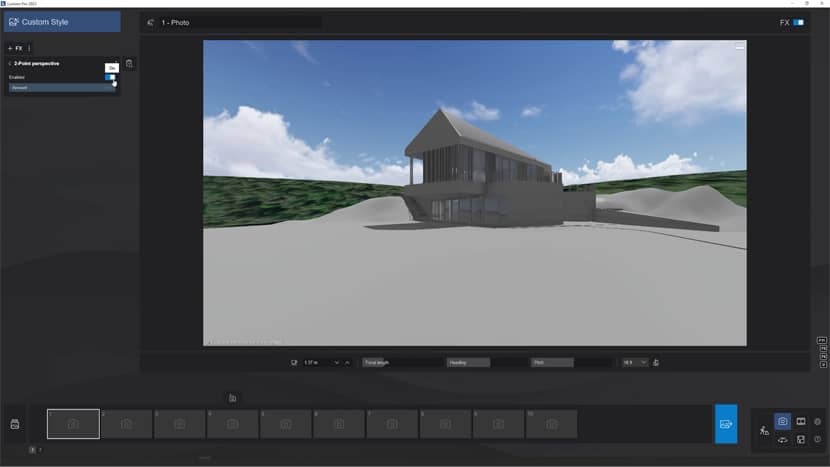
But first, by looking at the image properties, I can see it was shot with a 17mm lens. So, I'll set the same on the focal length.

I loaded the image and reduced the opacity. Now it's only a matter of fine-tuning the position to match the one on the image.

Terrain Materials.
For this type of exterior, I always add two layers of ground soil with different material IDs. On the top layer, I'll add grass-ground material, and I'll use one of the landscape PBR materials that are available. I will select this one and adjust its properties slightly.
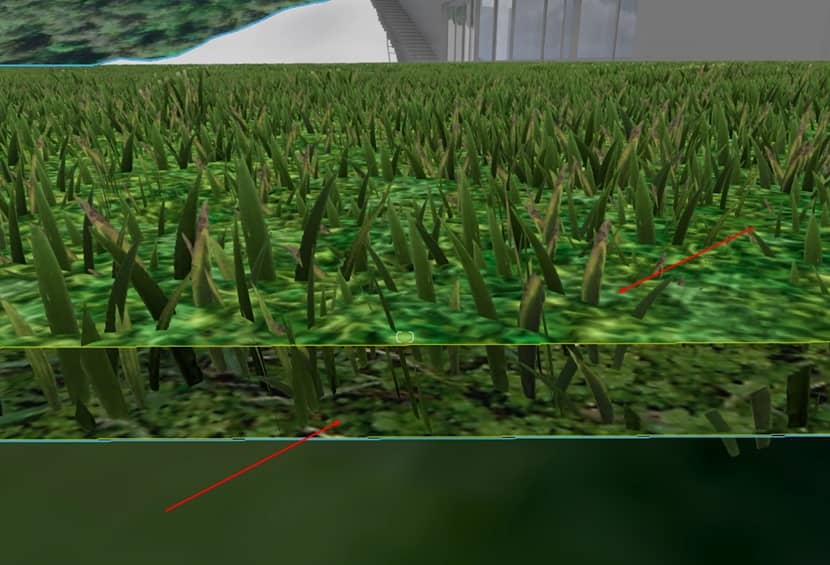
Then, on the bottom layer of the terrain, I set a 3D grass material. I selected the cut grass, which works great for this scene.
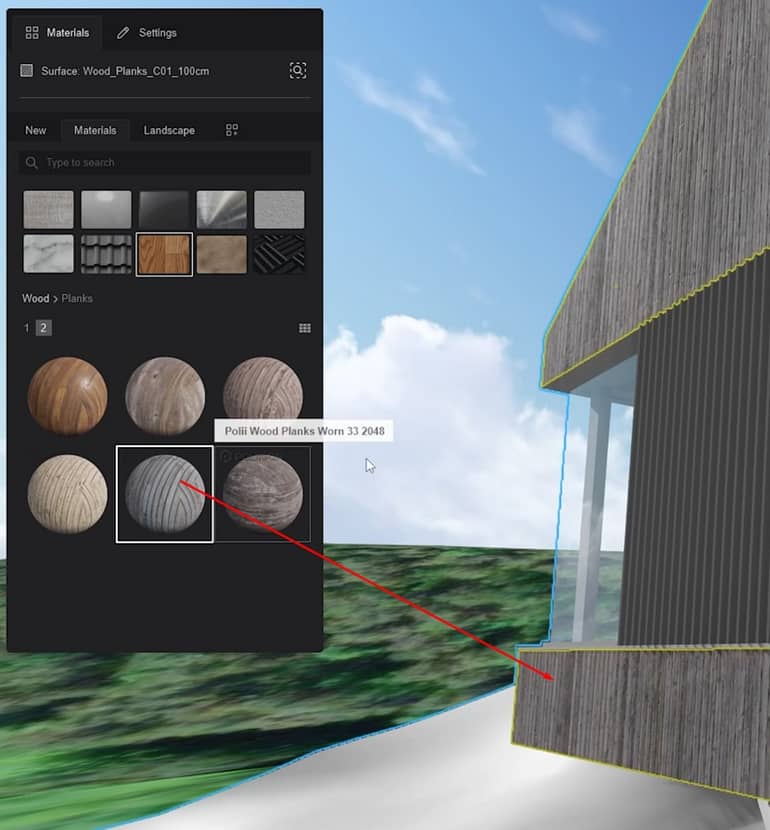
As for the House materials, I used materials from the Lumion library. The facade features wood planks, which you can find in the Wood Materials category section.
We have a Stones category for the ground, and inside, there is a section called Pavement. Here, I'll select material similar to the one in the reference.
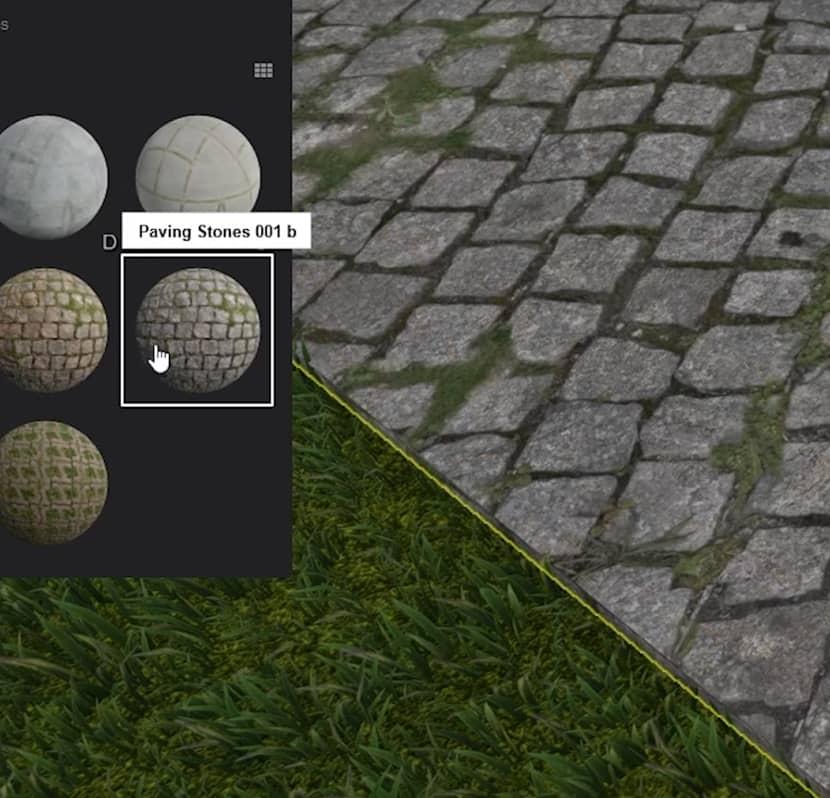
We have a Stones category for the ground, and inside, there is a section called Pavement. Here, I'll select material similar to the one in the reference.
Populating the Scene.
Before starting to populate the scene, Lumion has layers that help you organize your project and will help you hide the assets that are too heavy.
The first layer will be called the House. The second layer, I name it Trees.
Now, it's time to start adding some vegetation to the environment. The new 2023.3 version introduced a new line placement tool and cluster placement.
Starting with cluster placement. I think this works much better than the previous paint placement since you can place large quantities of objects in one go.
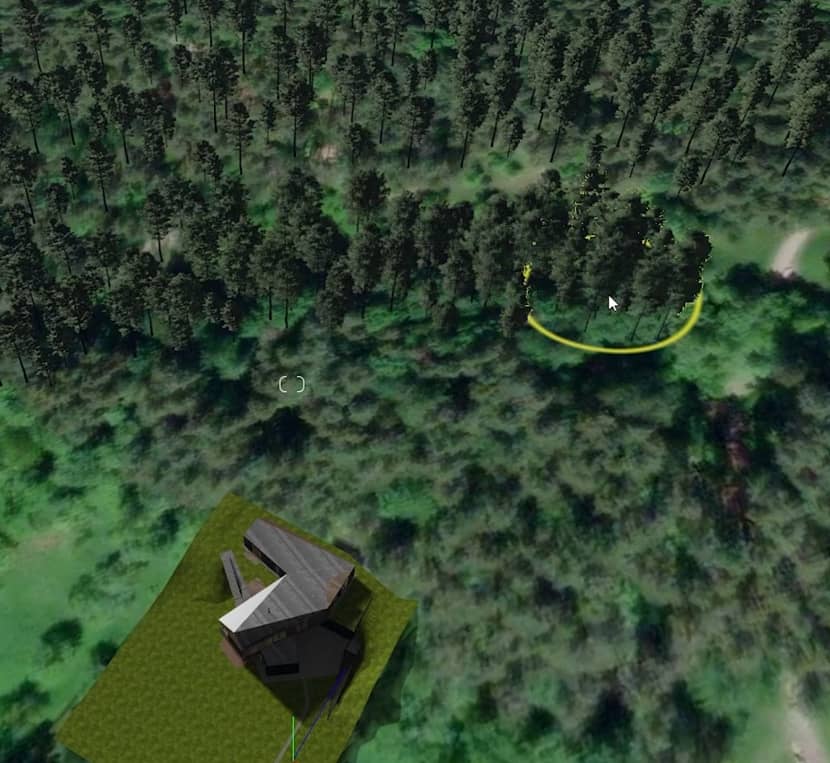
I'll browse the hundreds of tree assets that Lumion has, and select some pine trees that look similar to the ones in the reference.

Now, using the same assets, I select the new line placement tool. As you can see, when adding new points, I can control these points vertically, or I can simply click here to conform to the ground.
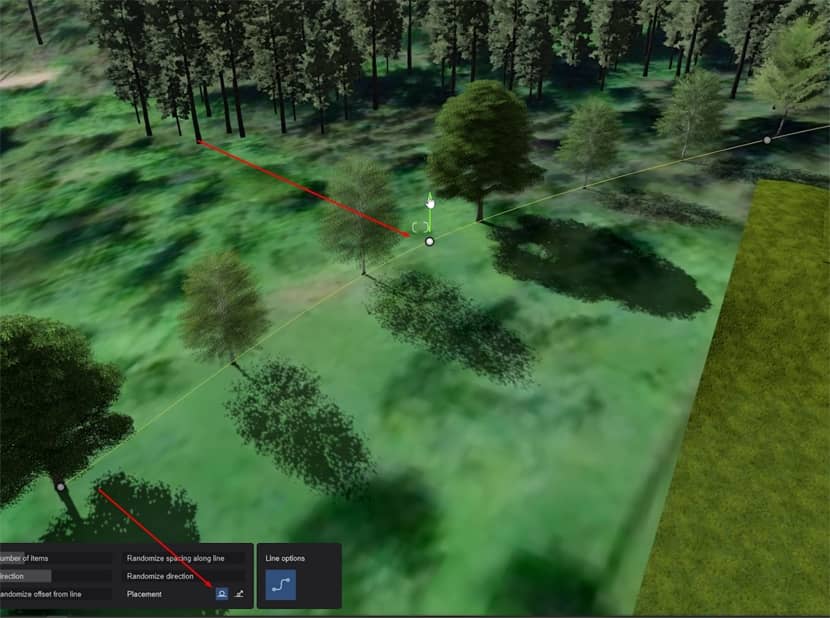
Another great thing about it is that they are now given a slight random color variation when placing natural objects. As a result, the trees should appear less uniform.
Lastly, I added the Pine trees I bought from the 3dsky website. They are high quality, but they do take more resources from your computer, so I added them to a new layer called HQ Trees. This way, I can always hide them to work smoothly.
After adding all these assets, I like to select them all and click on the option to randomize the rotation and the scale. This gives great variation to the scene.
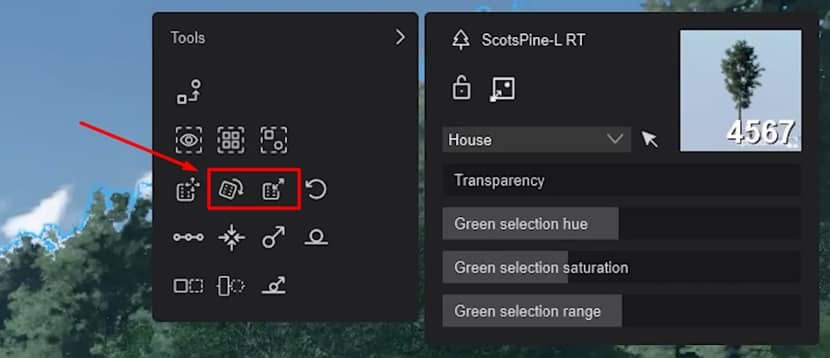
Nothing in nature is perfectly even or identical. When we're trying to recreate nature or any environment, we got to remember to mix things up a bit and embrace the chaos. That makes everything feel more authentic.
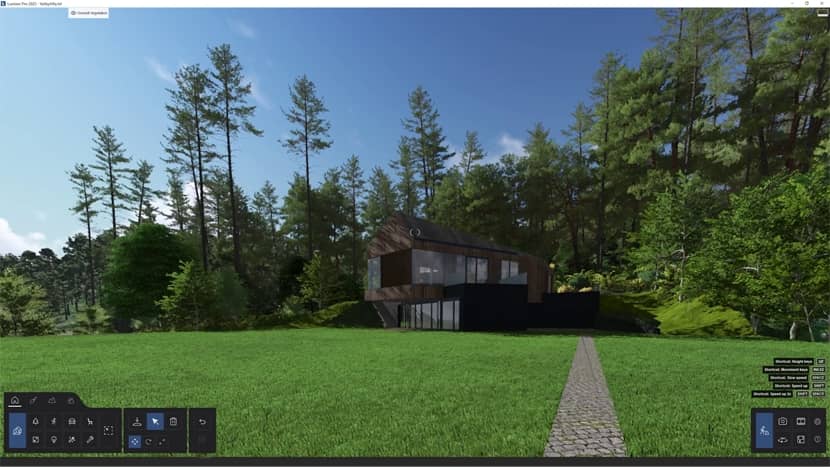
This is how the scene looks so far with all the natural assets.
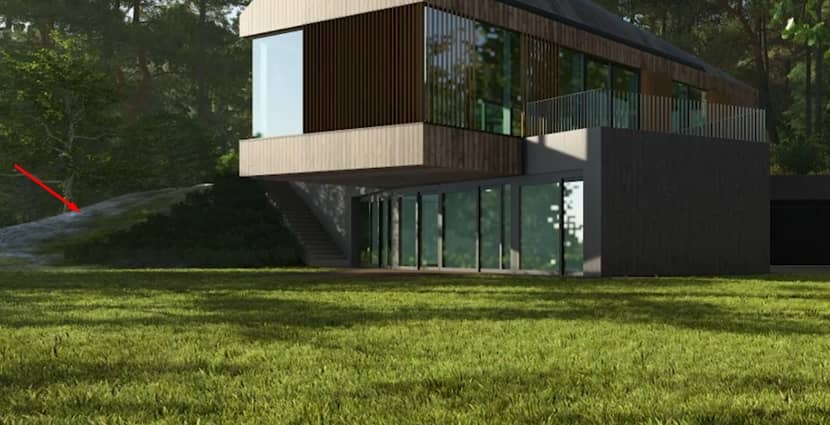
We do have one large tree in the foreground that's missing in my scene.
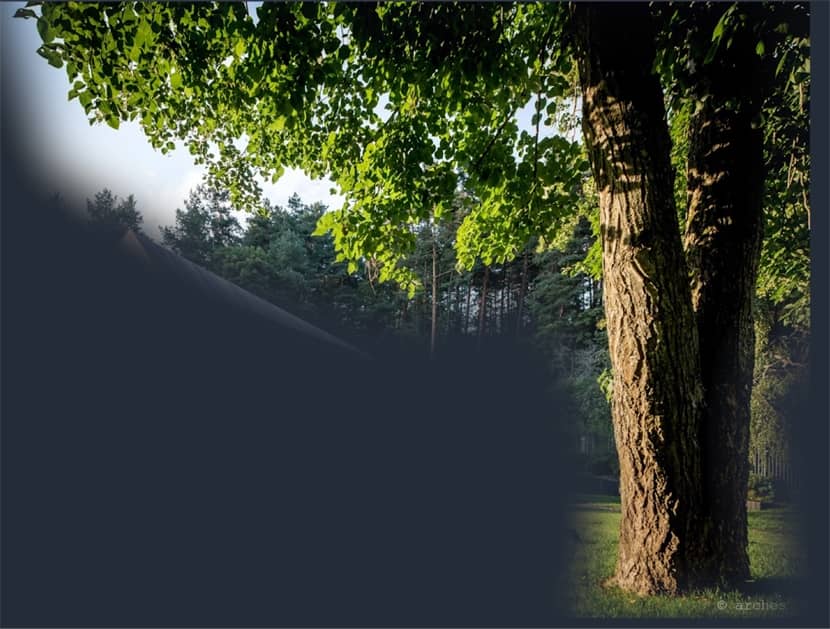
So I used this tree, which I also got from 3dsky, and placed it in the foreground.
Render Effects.
Now that we have our scene with the materials and well populated with assets, it's time to add some render effects. I want to go in-depth into one particular effect: the Real Skies.
This got a big update, and now Lumion allows you to add your own custom HDRi skies!
So, let's start by adding a Real Skies effect to the scene; you can see it looks quite different now.
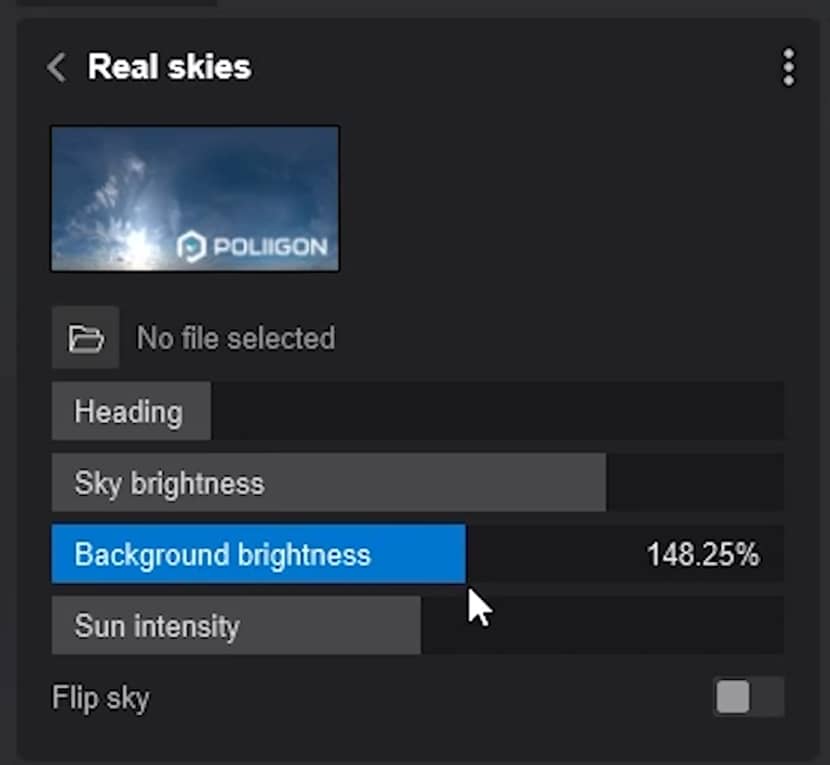
You have a new slot right here to add your own custom sky; there's the heading as before, where you can define the rotation. We now have Sky brightness, which stands for the overall scene brightness, and then we have background brightness, which affects only the sky and not the overall scene, and lastly - and actually, I should say finally - we have the Sun intensity inside the Real skies effect. This way, we no longer have to keep adding the Sun on top of the Real skies effect. You can control everything directly from within this effect.
Let me show you how to add custom skies. First, we can go to a website called HDRI-Haven. Here, you can find lots of HDRi skies for free. I went to Skies, then selected Partly Cloudy.

Via this button, you can select which resolution you want. Lumion allows up to 16K resolution, but in my case, 8K should be more than enough. When you click the button, the download starts.
Now, back to Lumion, click on this folder icon to load the new HDRi. After selecting it, it's a matter of adjusting the parameters.
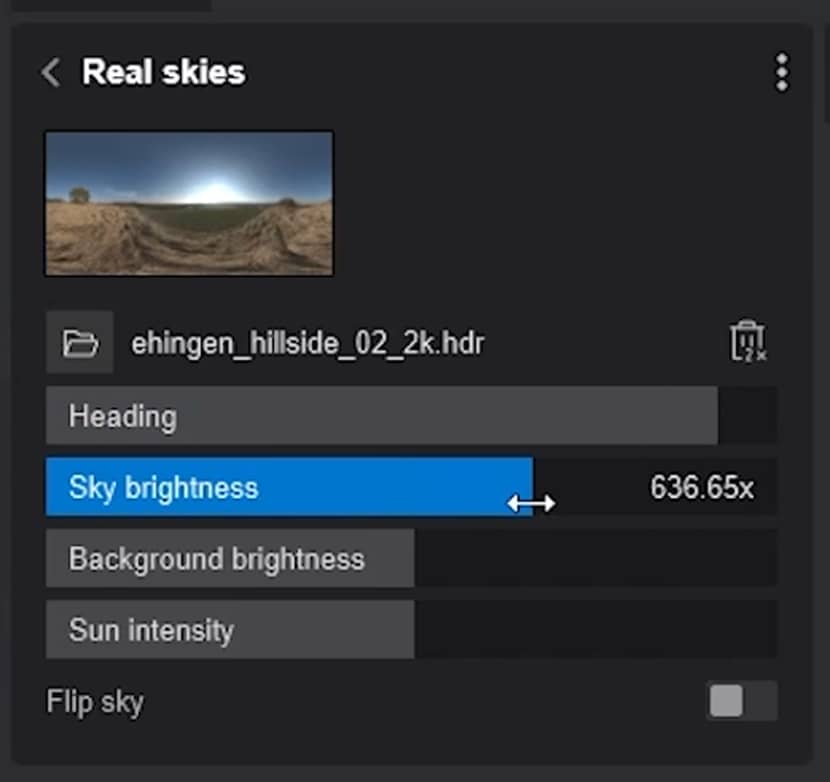
And this is how it looks, with only this effect. You can see it already looks quite nice!
Now, looking back at my reference image, we can see there are some atmospheric effects.
We can simulate this by adding a fog effect. I just increased the density and increased the falloff. Then I changed it to a slightly yellowish color and added a bit of brightness.
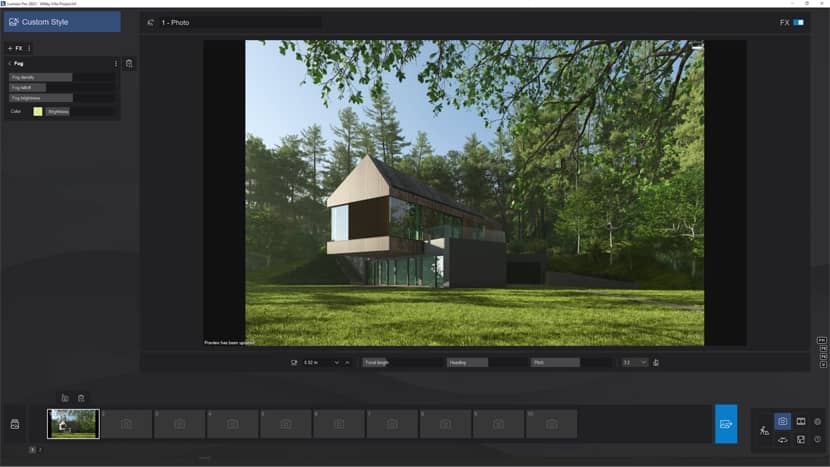
And this is how it looks. Next, I added a precipitation effect. No, I don't want to have any rain or snow on my scene, I just want to add a little bit of the precipitation phase effect, to add some material variation to the terrain.
LUT Profiles.
I added a color correction effect, and I just wanted to focus on another new feature: LUT Profiles. A LUT is a set of color-grading effects, stored within a single file. You can find plenty of LUTs for free online, but Lumion already ships a few for you to use.
I will select the architectural night and adjust the opacity to decrease the intensity of the LUT. This gives a more coherent color to the whole scene.
Scene Humanization.
To finish the design, I'll add a table and chairs from the Lumion library and place a car next to the garage.
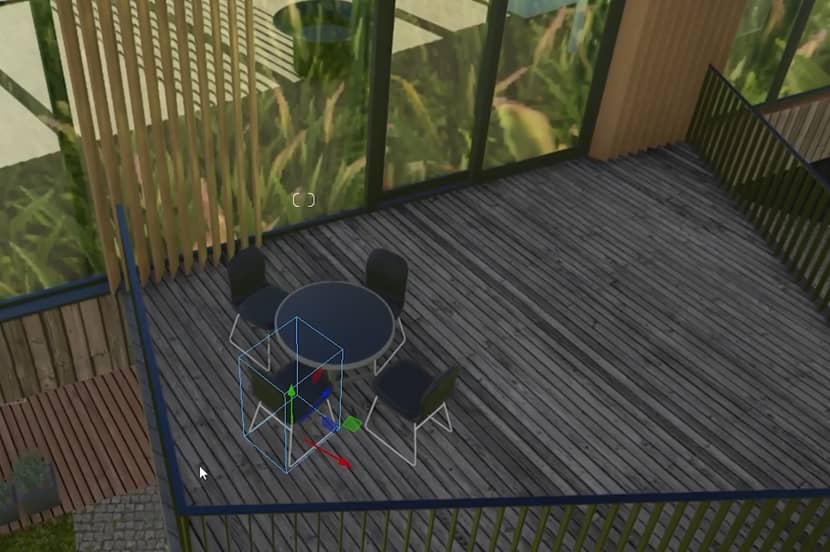
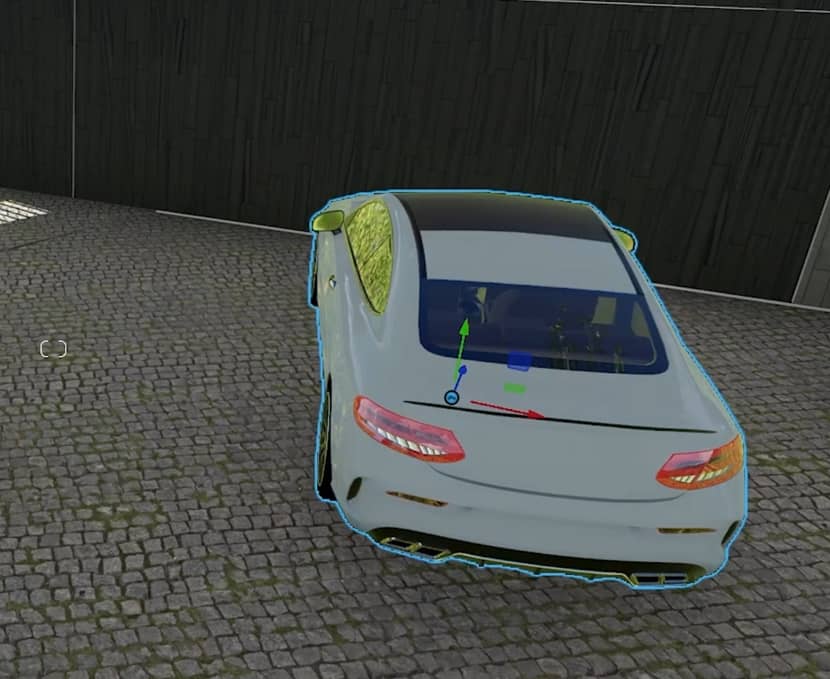
Now, we created a feel of someone living here, which makes it easier to imagine yourself sitting in those chairs, enjoying a beautiful forest view.
Now, in some of the project photos, there are people with motion blur effects. This is achieved with a low shutter speed from the real-world camera.
Did you know that you can do this exact effect inside Lumion without any post-production?
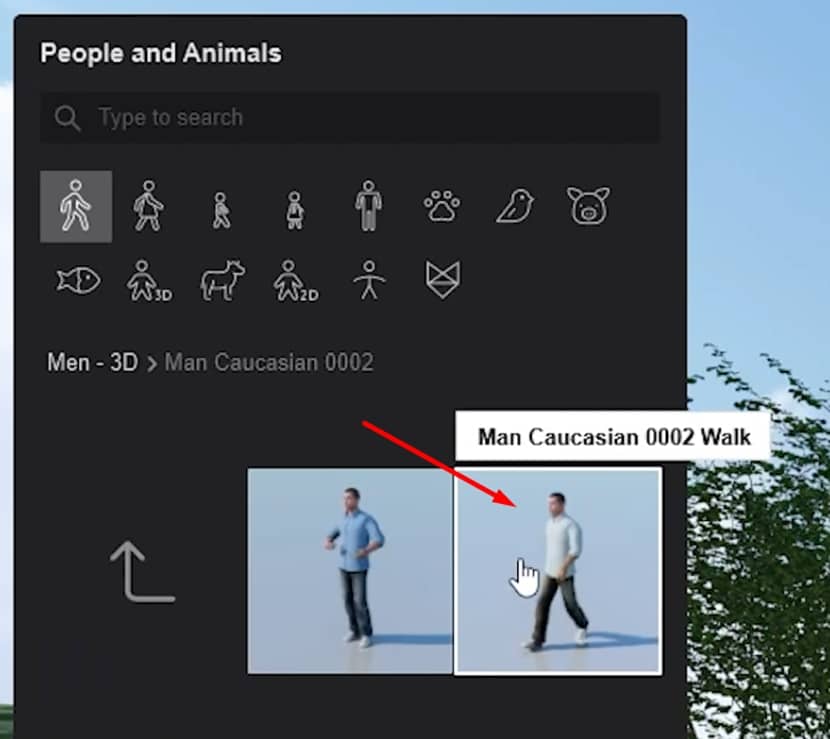
For this to work properly, I selected one character from the 3D people - not the static ones. This one walking will do just fine.
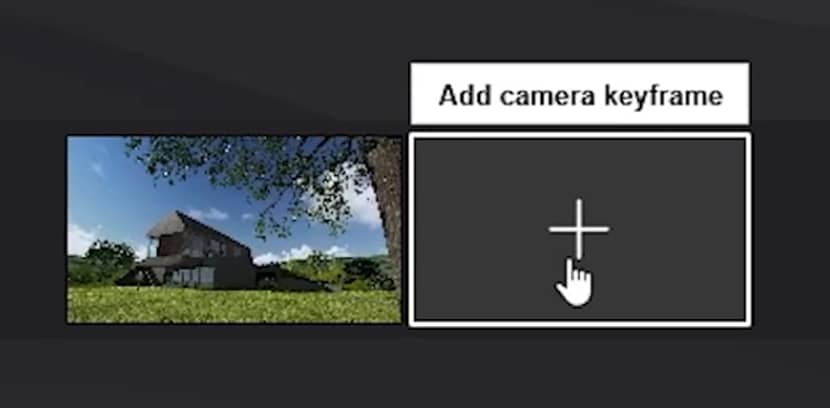
Then you need to go to Movie and click twice to add a new camera animation, without any movement.
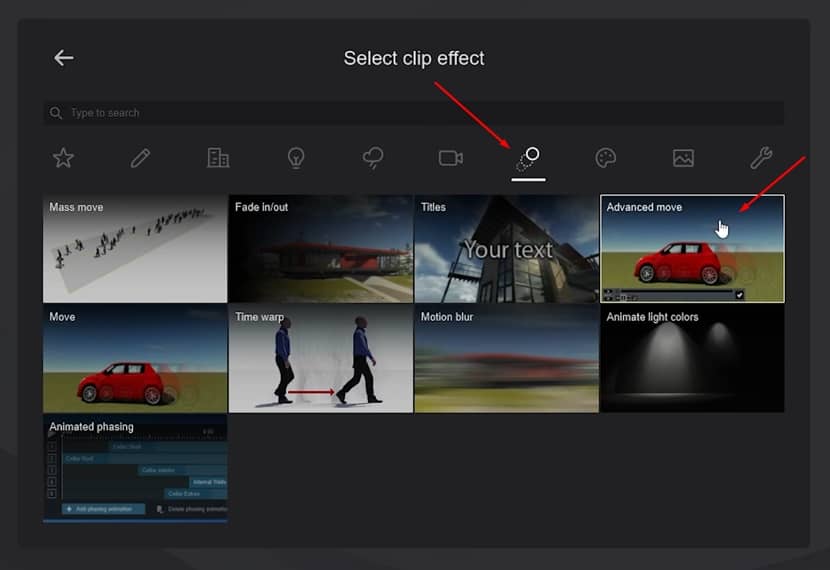
And now, you need to add an Advanced Move effect.
Let's click Edit, and here on the 0, all the way to the left of the timeline, you click this button to add a new keyframe.
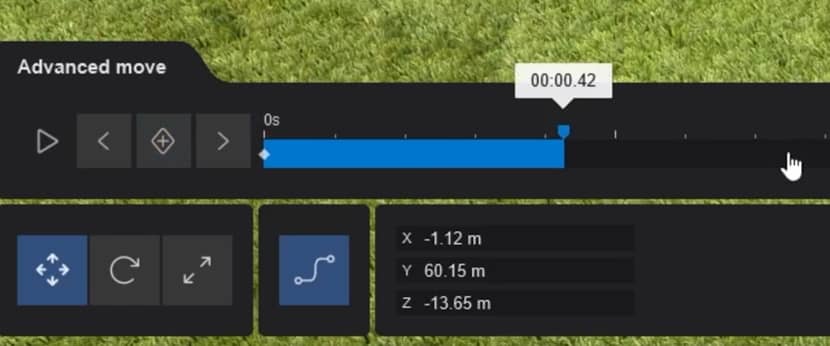
Now, just move the timeline to the end and move the character to a position further away from the camera. Click on the keyframe to set a new position.
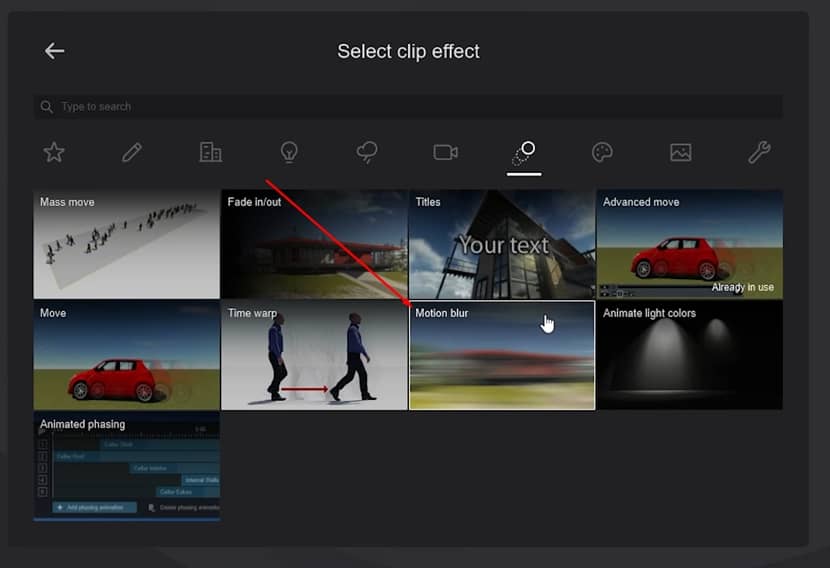
We need another effect to make this right. Let's search for Motion Blur.
Set it to the maximum, and now click on Render Movie. At the top, let's select Image Sequence. In the Frame Range, select Range and here you can say that you want from 25 to 25.
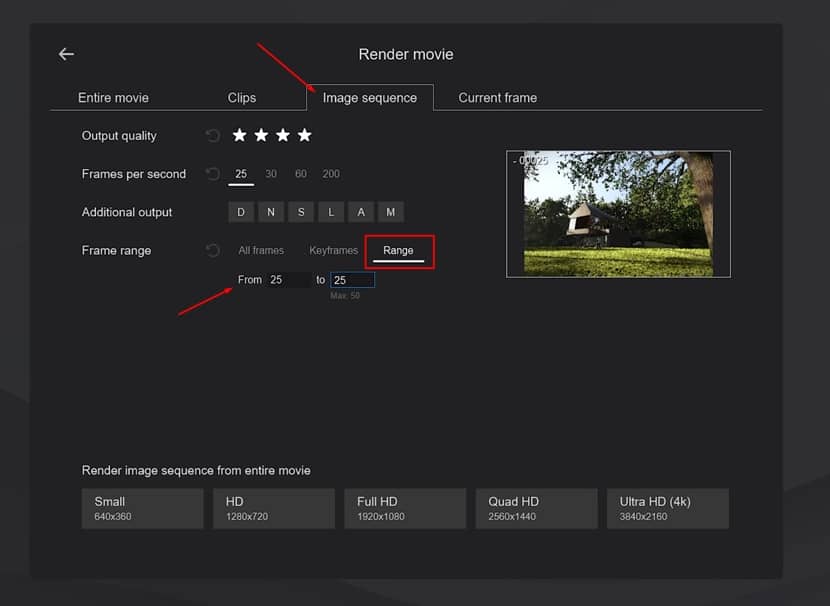
You can see a small preview on the right side. Just select the resolution and render it.
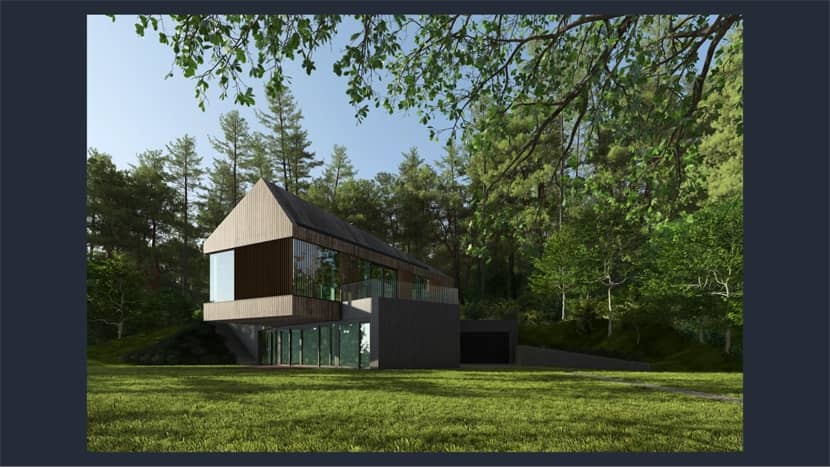
And this is the final result. As you can see, you now have a person with full motion blur, like you typically see in architectural photography.
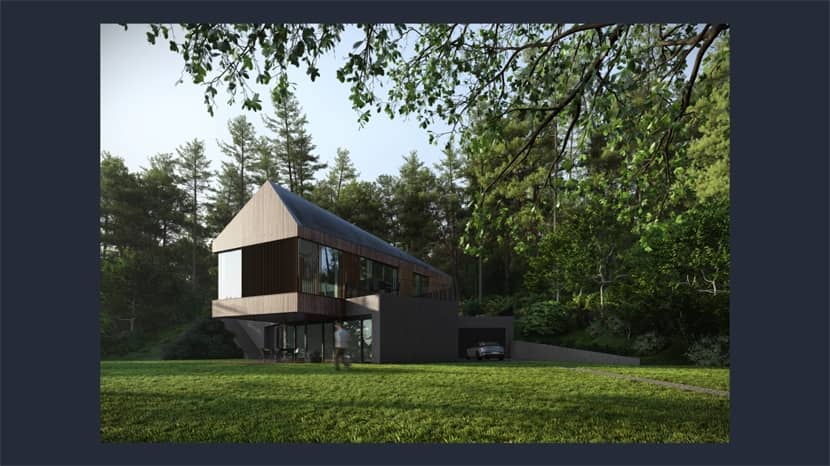
And this is the final image, after some post-production in Photoshop. It was done some color correction in the Camera Raw Filter, and some lens imperfections adjustments.
I hope you like this tutorial. You can find below a video to follow the tutorial step-by-step.
Kind regards,
Nuno Silva.
About the artist
Nuno Silva is a 3D artist specializing in architectural visualization. With over 10 years of experience in the field, he has spent the past few years focusing primarily on architectural renders. Based in his home office in Portugal, Nuno has had the opportunity to work on projects for numerous long-term clients worldwide. His 3D renders have been utilized for buildings in Canada, the USA, Portugal, and other countries.
In addition to his professional work, Nuno has educated thousands of students online through his free videos and paid online training. He is dedicated to helping others build successful careers in 3D rendering on their terms.
![]()
![]()
![]()
![]()
![]()