
This guide delivers a friendly walkthrough on how to do motion capture in Blender, blending both DeepMotion's AI-powered path and a more hands-on manual method. You'll learn how motion capture works, why it's so powerful for animators, and how Blender makes it surprisingly accessible!
Motion capture, or "mocap" is the process of recording the movement of real people and applying that motion to digital characters. It's one of the most powerful ways to bring animations to life, giving them a realism that is hard to replicate by hand. Mocap is widely used in films, games, VR experiences, and even in pre-visualizing complex scenes.
For years, motion capture required expensive suits, multi-camera setups, and specialized studios. But today, AI-powered services and Blender's built-in tools have made the process more accessible than ever. Whether you're an indie game developer, a filmmaker, or a hobbyist animator, you can capture motion in your living room and integrate it into Blender with just a few clicks.
This guide will walk you through two complete workflows:
- The DeepMotion method, a fast, AI-driven solution that requires no special hardware.
- The manual BVH/FBX pipeline, which offers more flexibility and control for advanced projects.
After reading this article, you'll know exactly know how to bring your performance into Blender and turn it into a fully animated scene.
Option 1: Motion Capture with DeepMotion.
If you want to get started with mocap right away, DeepMotion is your best friend. It's an online AI service that can take any standard video and convert it into an animated 3D rig. You don’t need markers, suits, or multiple cameras but just a decent video and an internet connection.
Watch this short tutorial on using DeepMotion with Blender and you will directly get to the point! This tutorial also uses ReadyPlayer.me Platform for creating an avatar first.
Step 1: Create a Free DeepMotion Account.
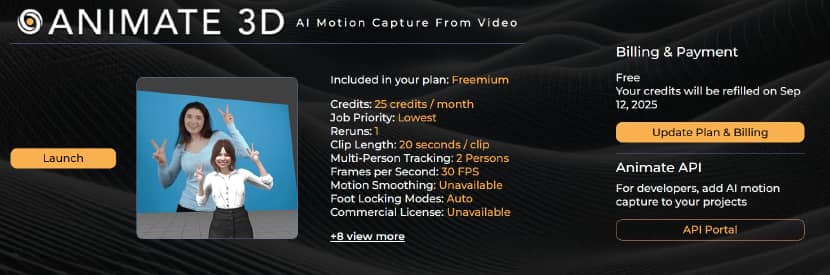
Visit DeepMotion's Animate 3D page and sign up for a free account. The free plan gives you a limited number of seconds per month to experiment with, which is plenty for testing before committing to a paid tier. Once signed in, you'll have access to their Animate 3D portal. Press the "Launch" Button to enter the room!
Step 2: Record Your Mocap Video.
Use a smartphone or camera to record yourself performing the action you want. Keep your body fully in frame, wear high-contrast clothing, and make sure the lighting is even. The AI tracks limb positions more accurately when there's a clear distinction between body parts and the background.
Pro Tip: Perform each movement clearly and deliberately, as fast and blurry gestures can cause tracking errors.
Step 3: Upload the Footage.
Now press the "Create" button.
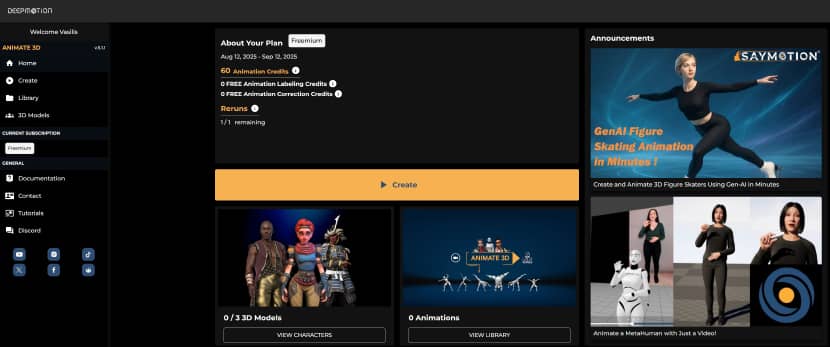
Inside the Animate 3D dashboard, click "Drag and drop Video" and select your file. DeepMotion supports formats like MP4, MOV, and AVI. Keep videos short (ideally under 60 seconds) to avoid processing delays.

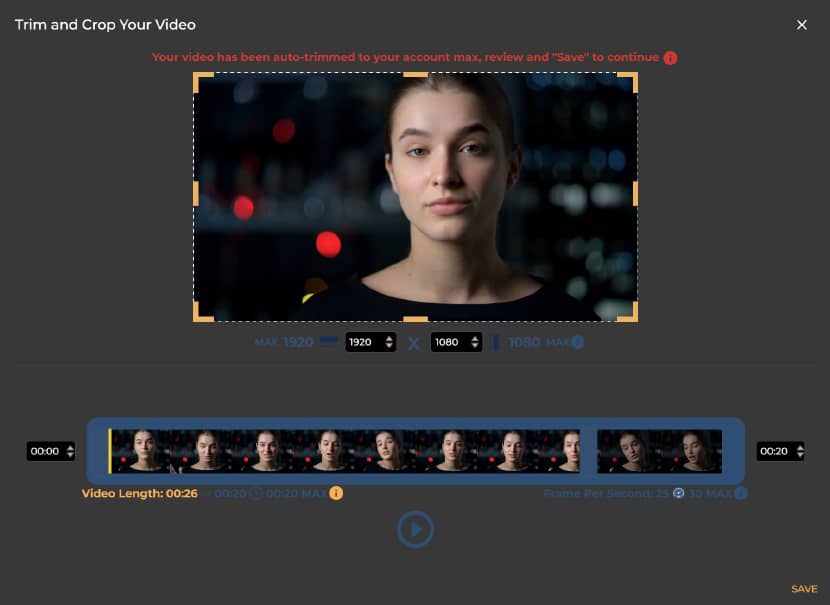
For testing the process, we used the portrait stock video footage below:
As its length was 6 seconds above the limit of the free version, 26 instead of 20, deep motion gives the option to trim it!
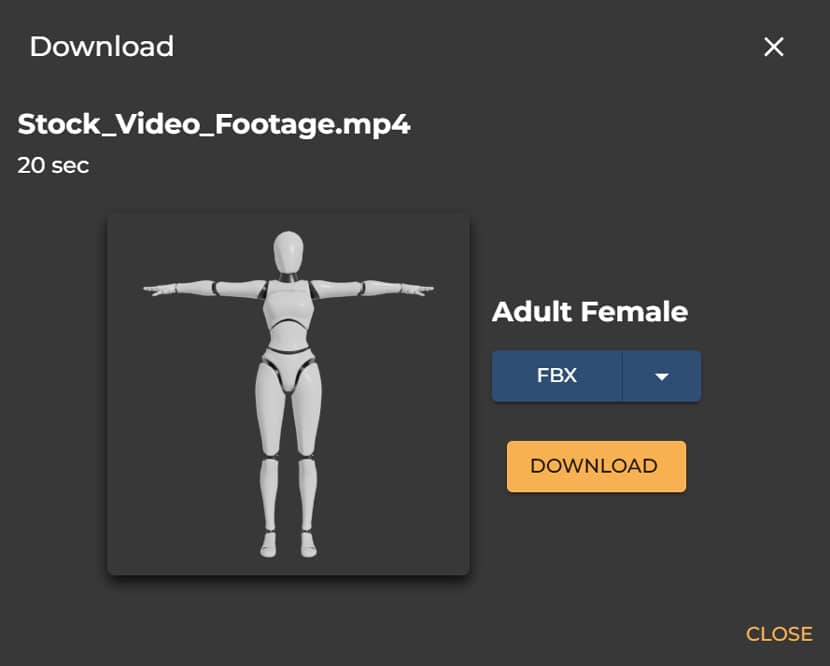
Step 4: Choose Output Settings.
DeepMotion allows you to select output formats like FBX or BVH. FBX is usually preferred for game engines and Blender projects. You can also toggle settings like foot locking, motion smoothing, and skeletal scaling for more accurate results.
Step 5: Download the Animated Rig.
Once DeepMotion processes your video, you'll get a downloadable 3D animation.

This file contains the skeleton and keyframe data extracted from your performance.
Step 6: Import to Blender and Attach to Character.
Open Blender and go to File → Import → FBX (or BVH if that’s your chosen format). Position your rig in the scene and align it with your character. If your character isn’t rigged, you can parent the mesh to the imported armature using Automatic Weights.
Step 7: Animate and Render in Blender.
With your character rigged, you can tweak the animation in the Graph Editor, add secondary motion, or mix actions in the NLA Editor. When you're happy, set up your lighting, camera, and materials, then render the scene. For rendering, you can always rely on a render farm like Rebusfarm to get your animation rendered in no time and move on with your project.
If you are an impatient artist, as usual, here is a very great and successful tutorial. This tutorial by Joey Carlino, "Character Animation for Impatient People", is a fast-track guide to animating characters in Blender without spending years mastering every detail. It starts with obtaining a rigged character, either from sources like Mixamo, which offers ready-made rigs and motion capture animations, or from Blender Studio for more advanced control. Joey covers both automatic methods (such as using Mixamo animations, Rococo Video motion capture, and the Mixamo add-on for easier rig control) and manual animation techniques, including posing, keyframing, pose mirroring, and using Auto IK. The video dives into efficient workflows with the Dope Sheet, Graph Editor, and Action Editor, plus time-saving features like Auto Keying for real-time recording, Pose Libraries for reusable poses, and the Wiggle Bones 2 add-on for automatic secondary motion. It also emphasizes core animation principles, the importance of video references, and approaches like pose-to-pose animation for better timing. Throughout, the focus remains on speeding up the process while still producing convincing results, making it ideal for beginners or anyone eager to animate quickly without sacrificing too much quality.
Option 2: Manual Motion Capture Pipeline in Blender.
The manual pipeline is for artists who want total control. This involves importing mocap data from BVH or FBX files, retargeting it to your own rigs, cleaning the animation, and preparing it for final output.
This CGDive tutorial below is part of the "Mocap & Retargeting in Blender" series and focuses on importing motion capture data into Blender using FBX and BVH formats. It explains common issues and best practices for clean imports, such as enabling automatic bone orientation for FBX files, adjusting primary/secondary bone axes for complex rigs, and understanding when to apply rotation or scale. For BVH files, it covers resizing oversized imports and pre-setting scale values. The video also explores typical mocap armature structures, how to identify and remove unnecessary bones (like leaf or twist bones), and how to handle unusual skeletons from sources like Octa-Core, Mixamo, Rococo, and others. Finally, it demonstrates a method to create a reusable animation library by importing multiple actions, consolidating them into a single armature, stashing them in the Non-Linear Animation editor, and saving them for future projects.
Step 1: Prepare Blender for Mocap.
Install Required Add-ons:
Blender has a built-in BVH importer. Go to Edit → Preferences → Add-ons and enable Import-Export: Motion Capture (.bvh). For FBX files, the importer is enabled by default. Add-ons like Auto-Rig Pro or Rokoko Studio Live can make the process much easier.
Set up Scene for Import:
Before importing, ensure your scene scale is correct and your character is placed at the origin point. Apply transforms (Ctrl+A → All Transforms) to avoid alignment issues later.
Step 2: Import Mocap Data.
Import BVH Files:
Go to File → Import → Motion Capture (.bvh). Adjust the forward/up axes and scale settings if your animation imports facing the wrong direction or appears too small/large.
Import FBX Files:
Go to File → Import → FBX. Pay attention to the “Armatures” settings in the import dialog—matching bone orientation is critical to avoid twisting.
Step 3: Retarget Motion to Character.
Using Auto-Rig Pro (Recommended):
Auto-Rig Pro’s Retarget feature lets you map bones from the mocap skeleton to your custom rig. This automates much of the process while allowing for manual corrections.
Manual Retargeting Techniques:
If you prefer hands-on control, use constraints like Copy Rotation and Copy Location to map each mocap bone to its counterpart on your rig.
Align Skeletons for Clean Retarget:
Ensure both rigs have matching rest poses and proportional scales before retargeting, as this avoids sliding feet and twisted limbs.
Step 4: Clean and Refine Animation.
Edit Keyframes in Graph Editor:
Use the Graph Editor to smooth curves, remove spikes, and adjust timing. This is essential for natural-looking motion.
Use NLA Editor for Layers:
The Nonlinear Animation (NLA) Editor lets you stack and blend animations—for example, combining a walk cycle with a waving gesture.
Fix Noise or Jitter:
Apply the Smooth Keys function (T → Smooth Keys) or manually adjust jittery frames.
Step 5: Render or Export the Final Animation.
Rendering Video:
Set your output format to MP4 or AVI, choose your resolution, and render (Ctrl+F12).
Preparing for Game Engines:
If you’re exporting to Unreal or Unity, use FBX and make sure “Only Selected” and “Bake Animation” are enabled in the export settings.
Common Issues in Blender Motion Capture.
Incorrect or Unsupported File Formats.
If Blender won’t read your mocap file, try converting it with tools like Autodesk FBX Converter.
BVH or FBX Won’t Import.
Double-check your import settings and Blender version. Some mocap files use non-standard bone naming, which can cause issues.
Misaligned Bones or Rig.
Always match rest poses and scale before retargeting. Auto-Rig Pro can help automate alignment.
Animation is Laggy or Unresponsive.
This can happen if your scene scale is too large or if there are excessive keyframes. Simplify curves in the Graph Editor to improve performance.
This BoroCG tutorial, "How I Clean Up My Motion Capture in Blender", is a detailed walkthrough on refining raw mocap data, especially from Rokoko suits, into clean, usable animation. Using an idle animation from his game project, the author explains common mocap issues like twisted feet, drifting knees, and skewed body alignment, often caused by magnetic interference. The workflow starts with importing FBX data into Blender (enabling automatic bone orientation) and retargeting it to a custom rig, with Auto-Rig Pro recommended for its accuracy and presets. He covers adjusting rest poses, fixing IK poles, and compensating for rig proportion differences. The main cleanup is done in the Non-Linear Animation (NLA) editor, using additive layers to tweak poses without overwriting the original motion. Techniques include straightening skewed hips, refining arm bends, stabilizing feet with location locks, removing knee twitches via the Graph Editor, and correcting foot sliding from retargeting mismatches. The tutorial also stresses proper rotation using the rig’s parent “trajectory” bone to avoid transformation errors. By layering adjustments and smoothing problem curves, he achieves a stable, natural-looking idle animation while preserving the original performance, showing that patient, layered NLA editing is the key to high-quality mocap cleanup in Blender.
Tips for Better Motion Capture Results.
Use High-Contrast Clothing.
This helps both AI-based trackers and optical mocap systems distinguish body parts.
Keep Movements Clear and Intentional.
Avoid overly fast motions that might blur or confuse trackers.
Use NLA for Combining Actions.
Stacking animations can give more depth - combine different clips to create unique character performances.
Final Thoughts on Blender Motion Capture.
Motion capture in Blender has never been more accessible. If you need a quick turnaround, DeepMotion offers an AI-driven solution that works with just a camera, and of course, it's not the only solution. If you’re looking for complete control and precision, the manual BVH/FBX method is a powerful alternative. Experiment with both, push your animation skills, and discover which workflow best suits your project. For the end of the article.
The following ProductionCrate tutorial, "How to Animate in Blender – FREE Mocap AI Tools", introduces three free AI-powered video-to-motion capture solutions—Rokoko Vision, DeepMotion, and Plask 3D—and explains how to use them with Blender. It starts with recording tips for clean mocap input, such as using a wide-angle view, clear subject separation from the background, minimal motion blur, and starting with a T-pose. The video then walks through each tool’s workflow: upload footage, process into 3D animation, and export as FBX. Plask 3D stands out for allowing you to apply the animation directly to your own rigged character before exporting.
For retargeting in Blender, the tutorial recommends using Rokoko’s free Blender add-on, which automatically maps bones from the source skeleton to the target character. Minor manual adjustments may be needed, especially if bone names don’t match perfectly. After retargeting, the video covers cleanup techniques for common mocap flaws—smoothing jittery motions in the Graph Editor using Gaussian smoothing, fixing alignment or timing errors via the Non-Linear Animation (NLA) editor with additive layers, and addressing foot slippage by converting legs to IK rigs and layering corrections on top of the base animation.
By the end, viewers learn a streamlined workflow for generating, importing, retargeting, and refining mocap data in Blender, making it possible to experiment with motion capture without expensive suits—just a camera, an actor, and AI processing.
Finally, it would be necessary to close this article by sharing a very informative presentation by Bartosz Barlowski on bringing real-time data into Blender during the Blender Conference 2023.
That's all, thank you for taking the time to read this article and we hope that it provided you with a basic understanding of how to do Motion Capture in Blender.
Kind regards & Keep rendering! 🧡
About the author
Vasilis Koutlis, the founder of VWArtclub, was born in Athens in 1979. After studying furniture design and decoration, he started dedicating himself to 3D art in 2002. In 2012, the idea of VWArtclub was born: an active 3D community that has grown over the last 12 years into one of the largest online 3D communities worldwide, with over 160 thousand members. He acquired partners worldwide, and various collaborators trusted him with their ideas as he rewarded them with his consistent state-of-the-art services. Not a moment goes by without him thinking of a beautiful image; thus, he is never concerned with time but only with the design's quality.
![]()
![]()
![]()
![]()
![]()
