Thursday, June 1st 2017 by Farid Ghanbari
My name is Farid Ghanbari and I have been working as a CG Generalist Artist for about 10 years. My overall experience includes games, advertising, architectural visualization, motion design, and VFX.
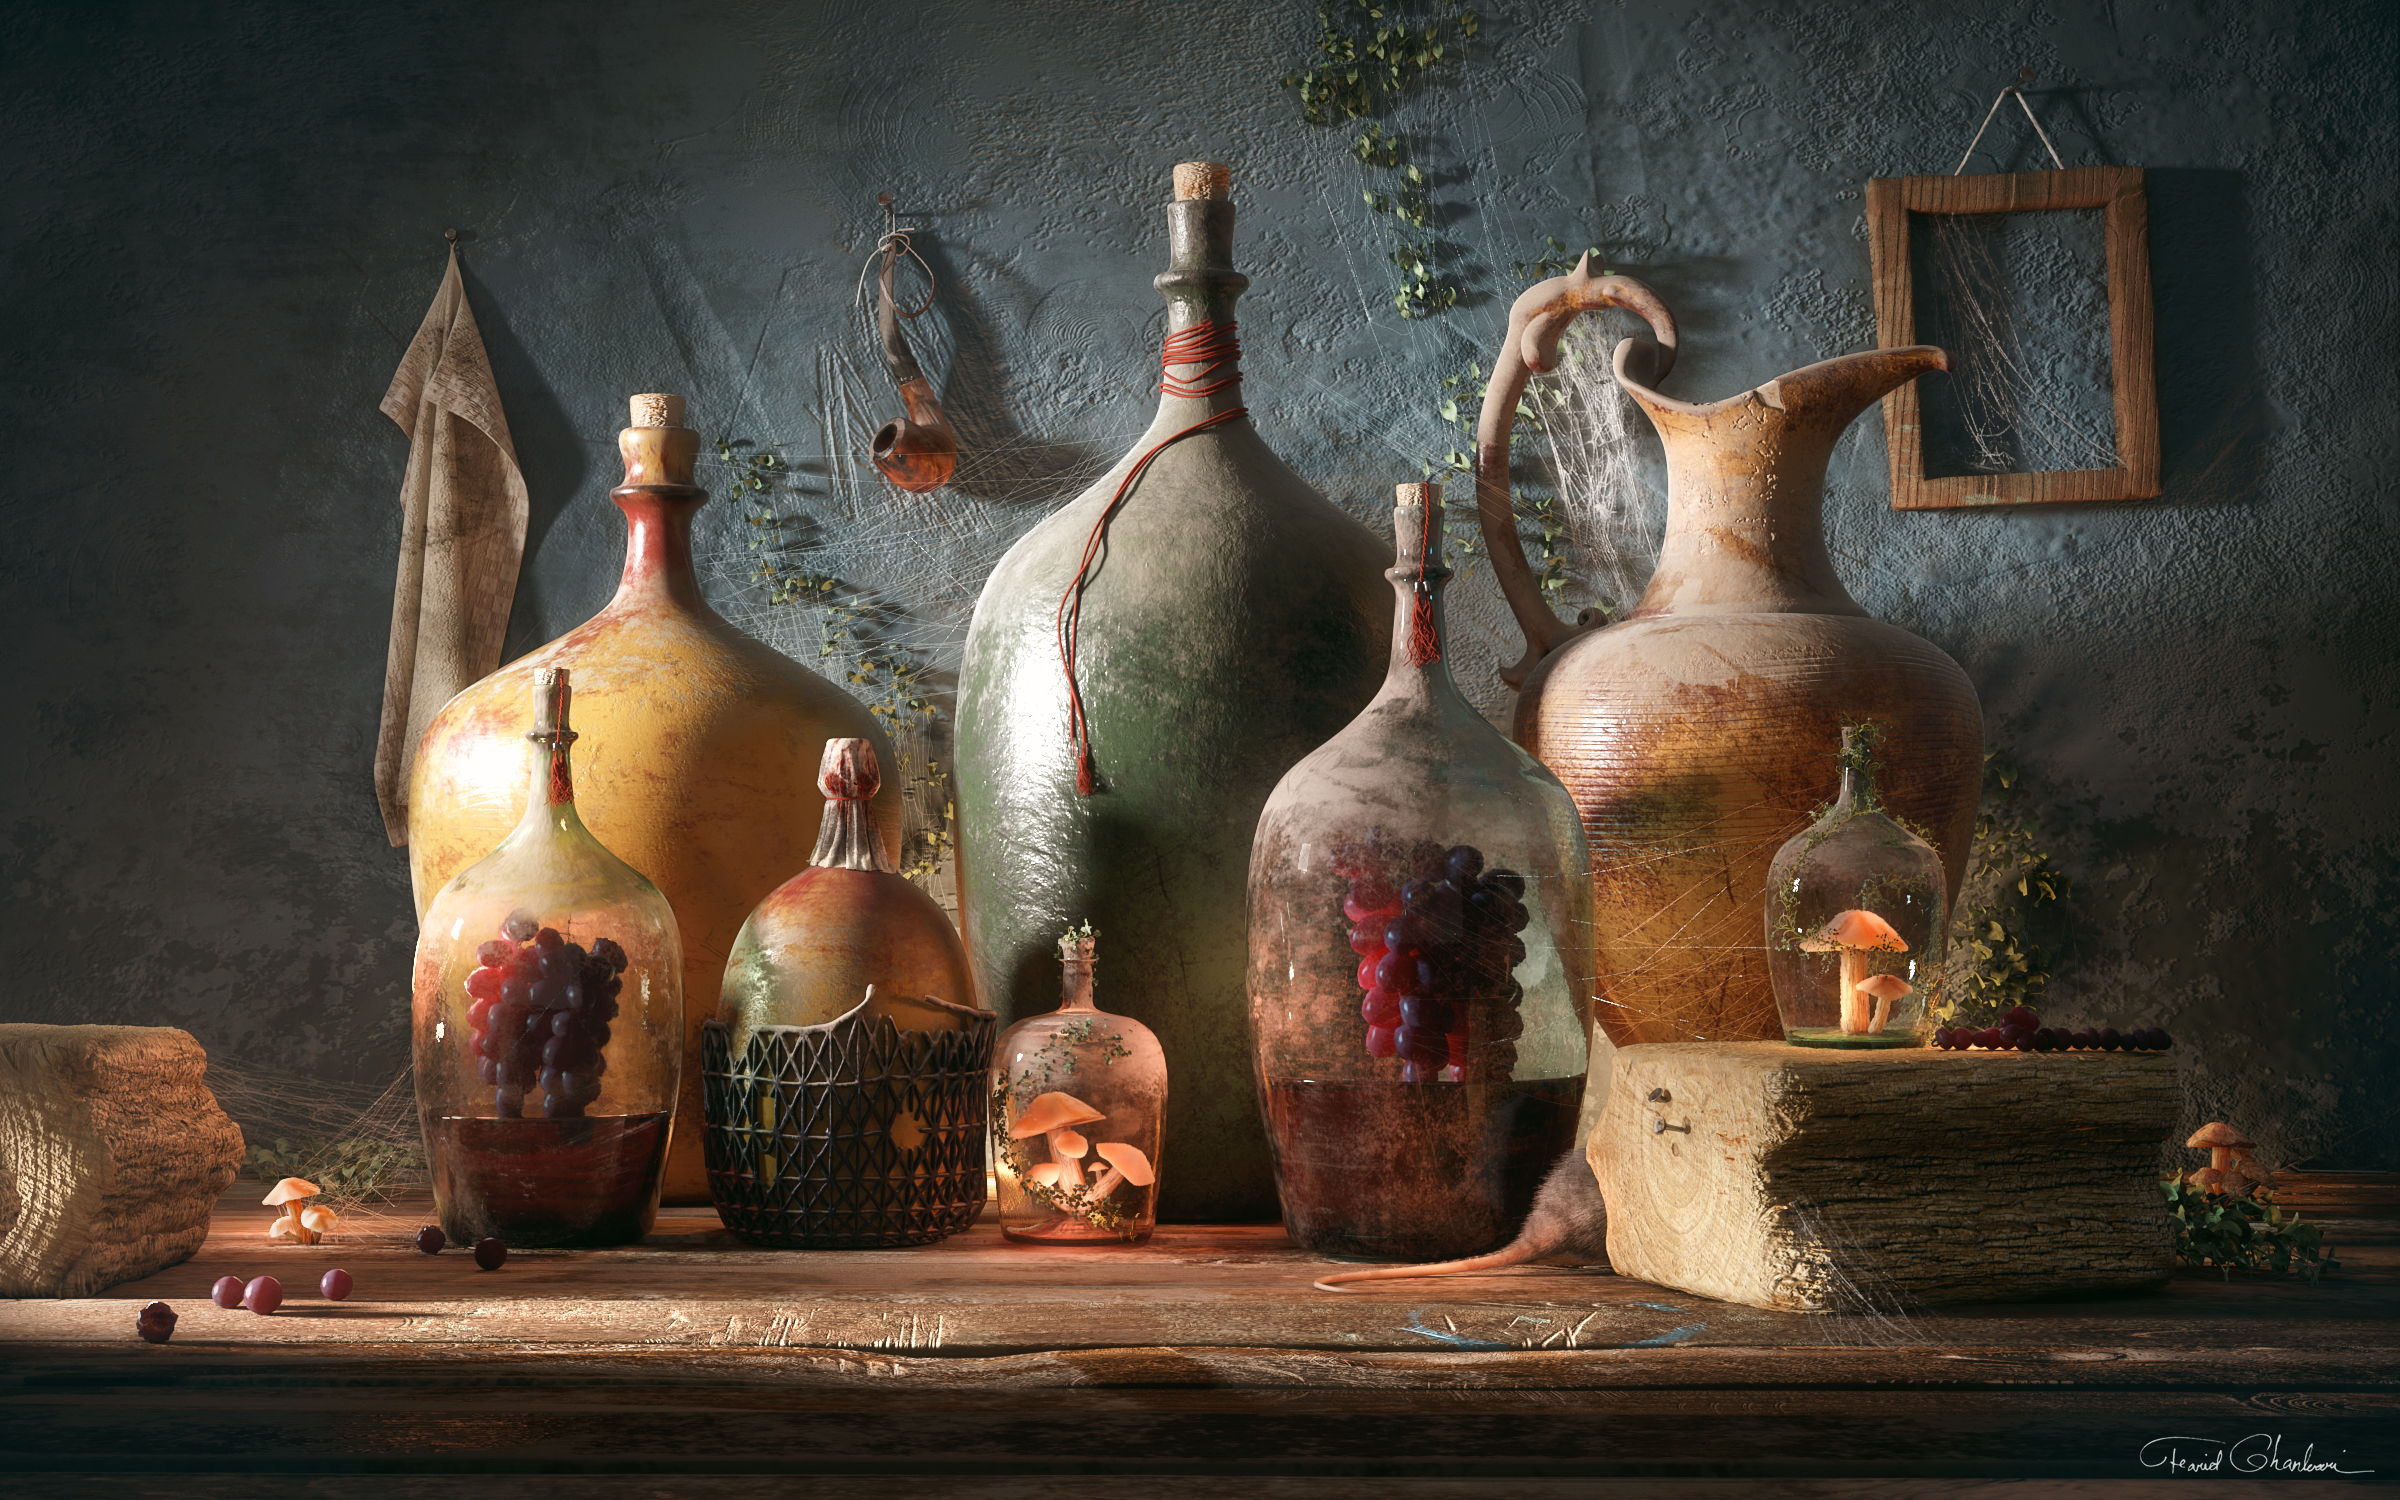
In this post, it’s my great pleasure to breakdown the development process of my latest artwork ‘Bottles of Life’, for you, the readers of the RebusFarm blog.
In addition, if you want to see the whole thing in motion, you can watch the time-lapse video below.
My main intent with this piece was to create something eye-catching with special emphasis on perfect lighting and detailed textures. So let’s get right into it!
1. Starting the project
While working, I’m deeply immersed in 3D software all the time, multitasking between countless tabs and windows. To not get lost in this shuffle, it is my top priority as a CG artist to always maintain my creativity and create images that aren’t appealing just from a technical point of view, but exhibit genuine artistic quality as well!
That’s why I try to make the time to study art fundamentals such as lighting principles, color scripts and rules of photography before diving headfirst into a new project. Once I have a general idea of what I want to do, the first step is gathering references!
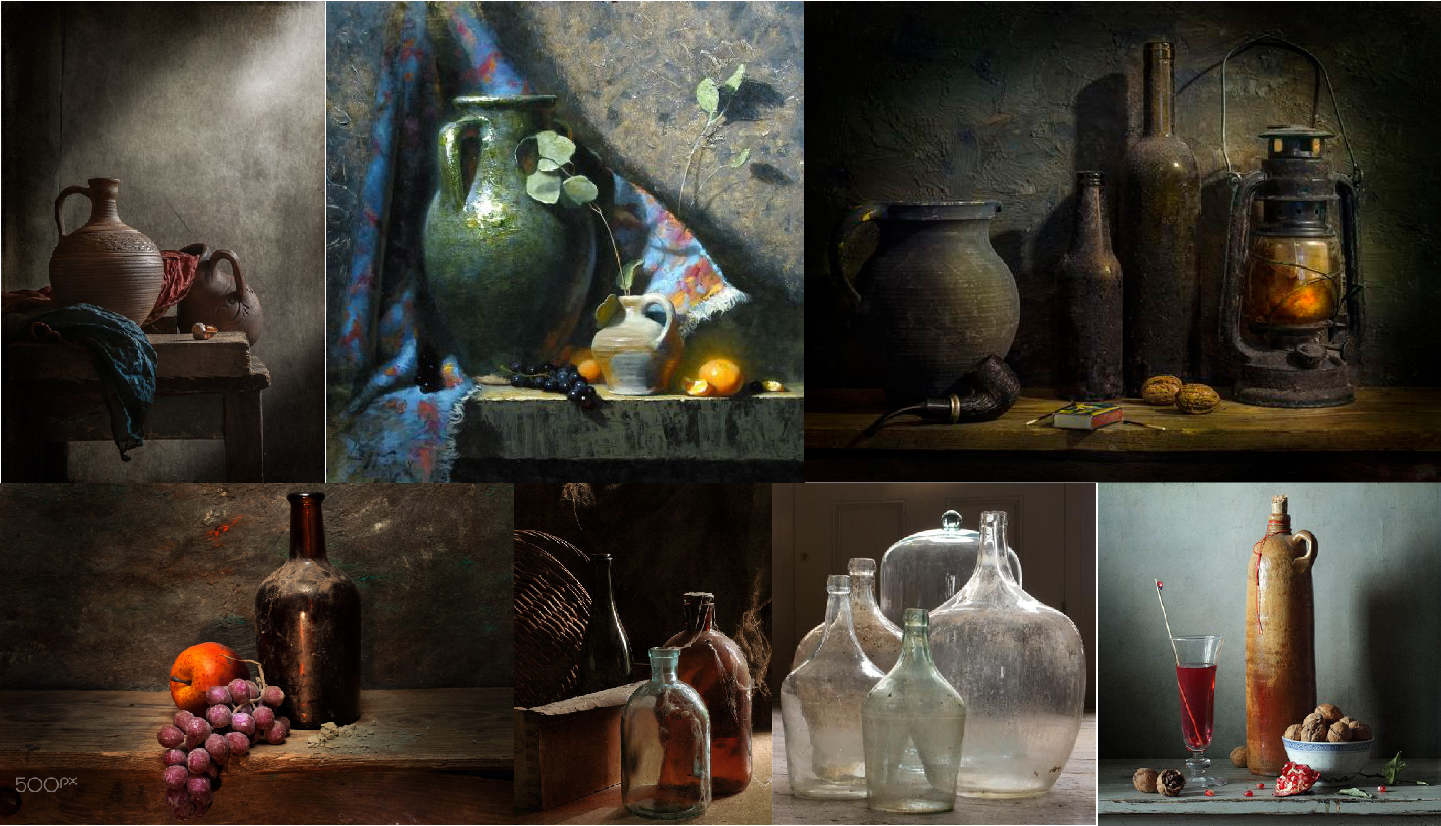
Just look at some of these references I’ve found. They’re awesome, aren’t they?!
Various references of jars and bottles
However, as I already mentioned, I’m not aiming for a strict photorealistic look; I want the final result to be more – more artistically, more magical even! In fact, at this point I usually try to spice things up a little: For example, how about adding additional light sources which we don’t have in the real world? How about defying the laws of gravity by making some grapes levitate in those bottles? But there’s no need to finalize your concept at this early stage since ideas will develop naturally during the process! Case in point: The very last thing I added to ‘Bottles of Life’ was the rat tail.
2. Modeling and setting up the camera
After gathering references and establishing a general concept, it’s a lot of fun to start experimenting in your apps!
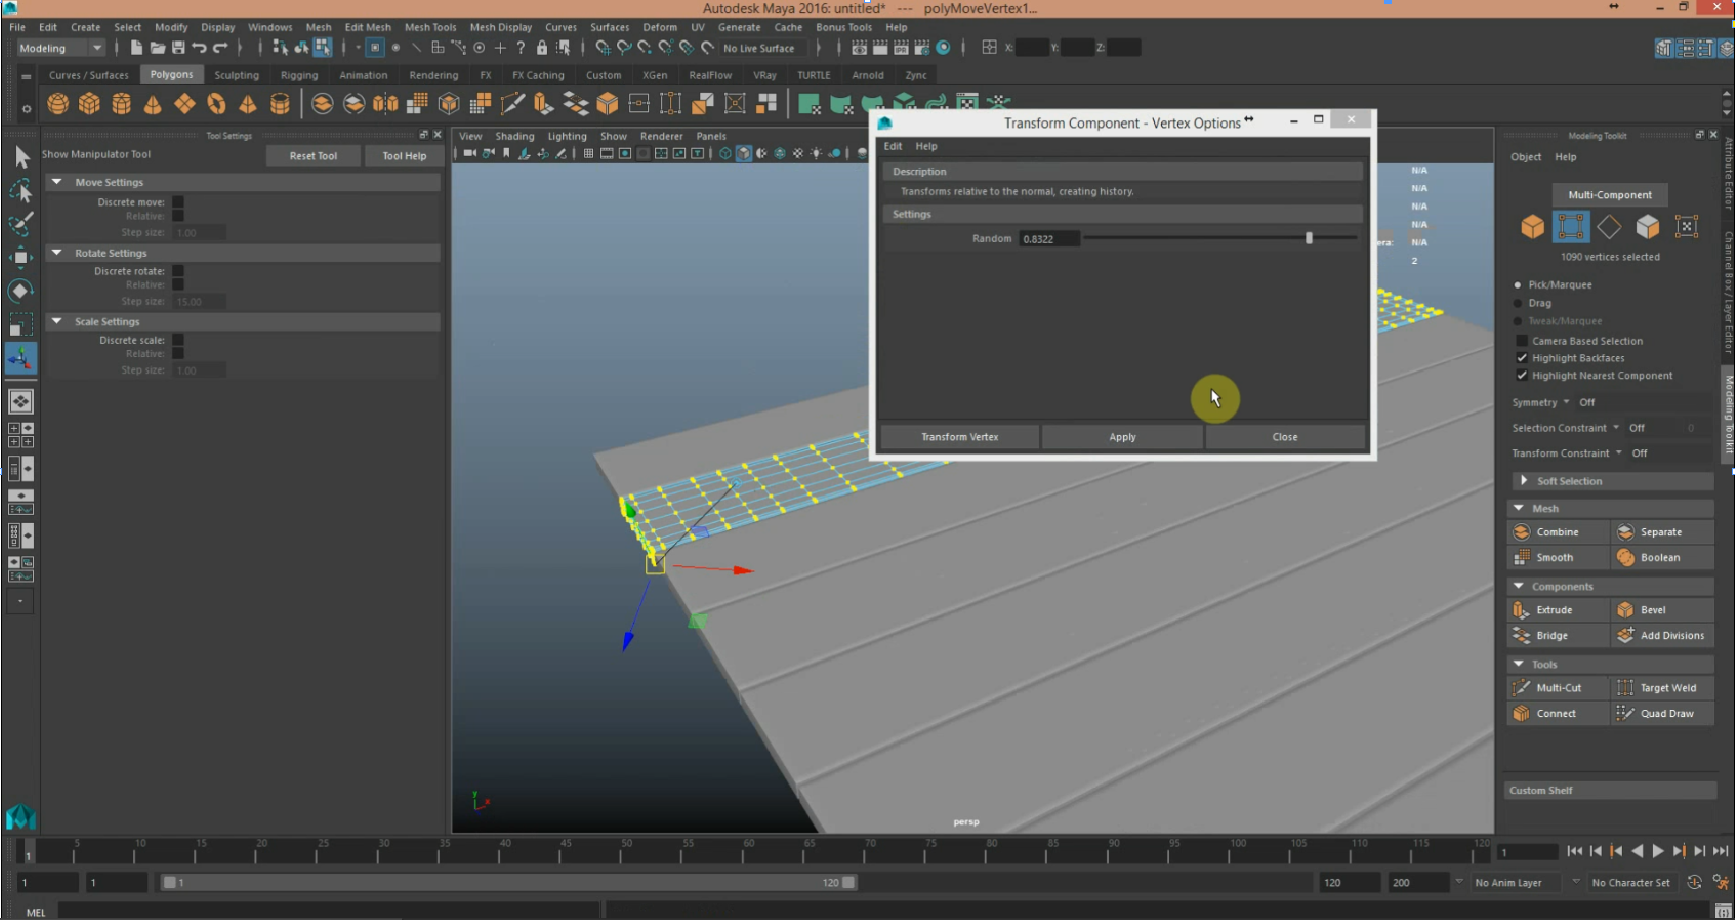
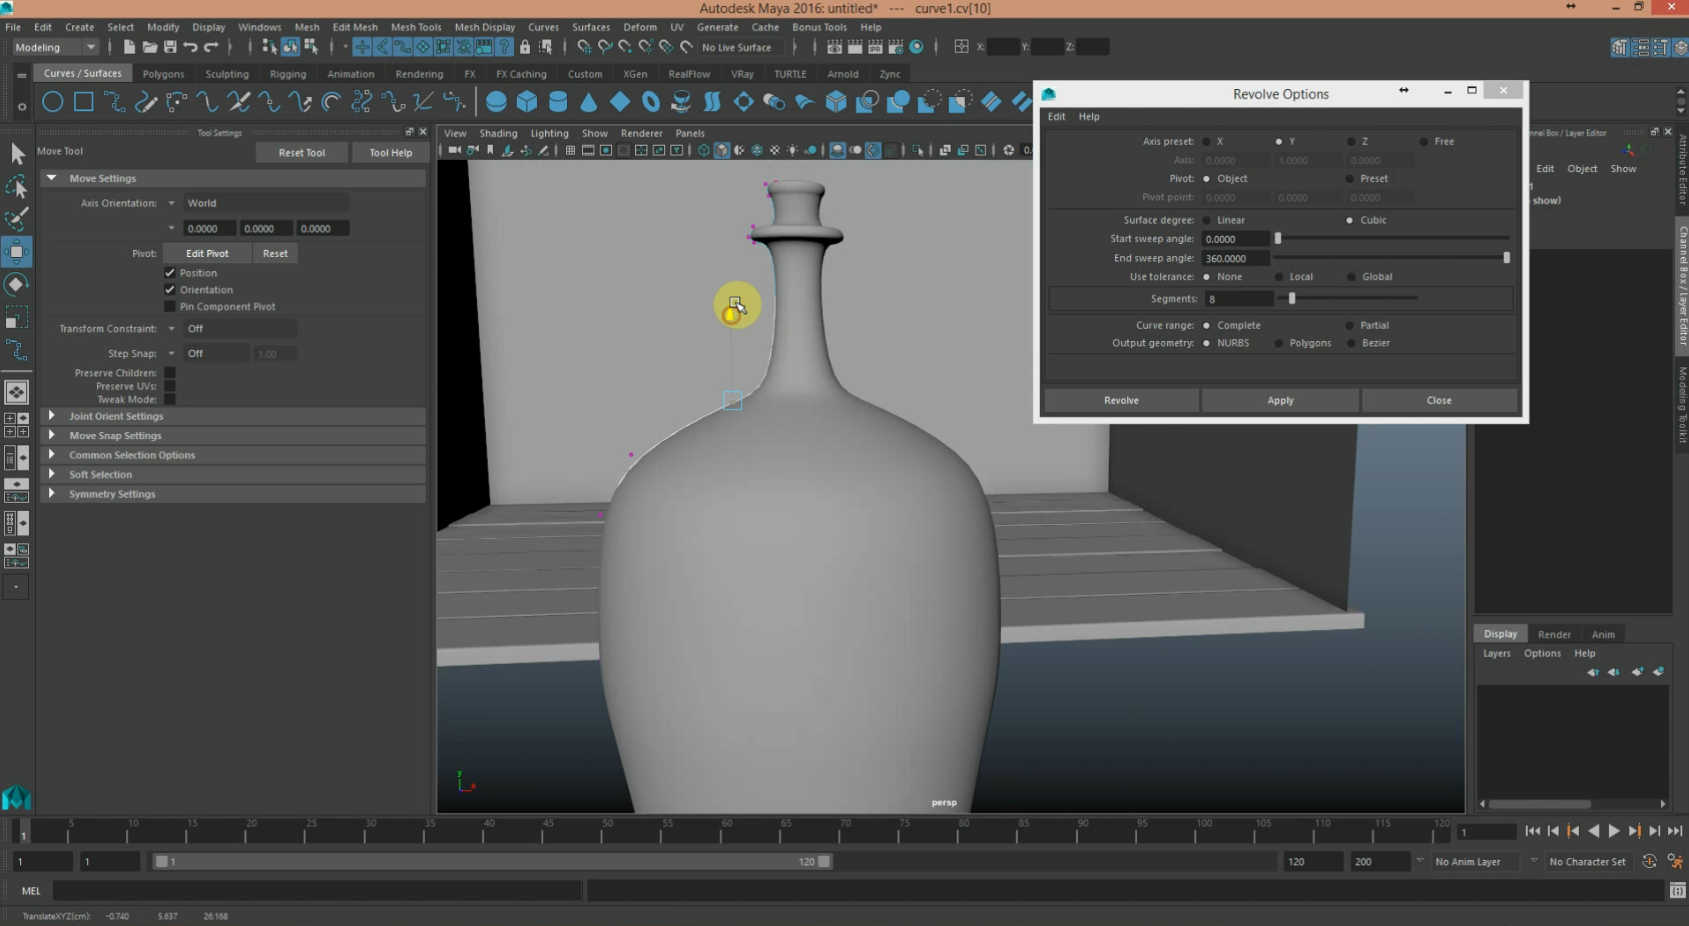
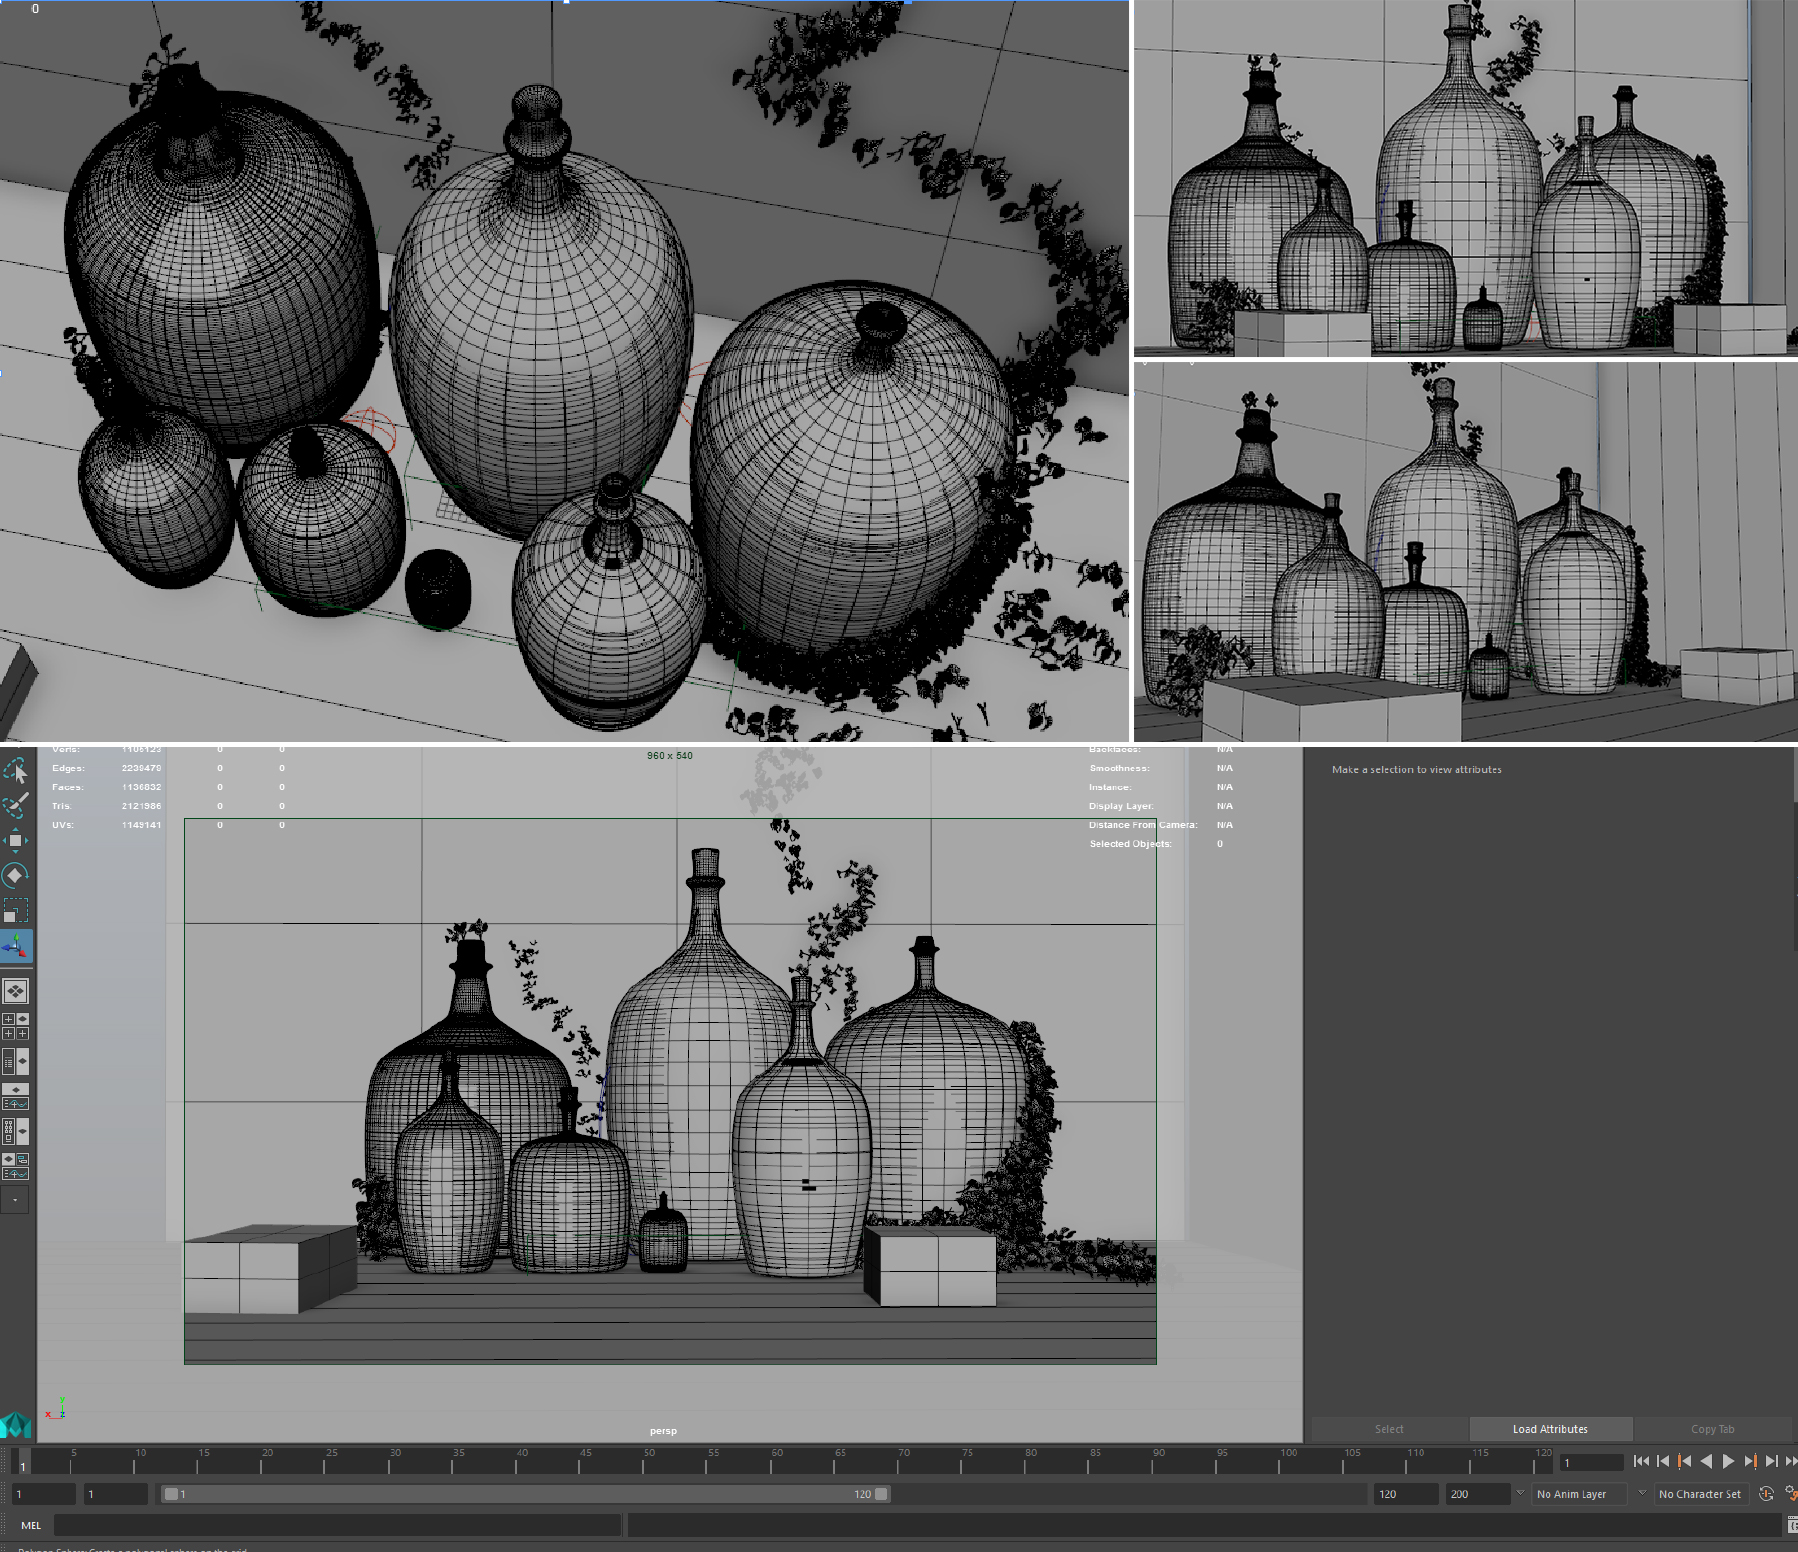
I ended up using Maya for about 80 percent of the entire project. I began by modeling basic shapes and blocks!
Modeling initial shapes and blocks
After playing around with object positions and different camera angles, I choose the camera view and composition I deem most fitting for the scene!
Of course, this might change as the project goes forward – not too much, usually just some minor adjustments!
Setting up the camera
Finding the best angle for your camera can take hours! Pay attention to golden points and try to concentrate on the heroes in your scene!
Do not forget to experiment with all the camera parameters besides tilting, panning and zooming such as angle of view, film gate, camera rolling and focal length. For ‘Bottles of Life’ I chose a 55mm. Love this focal length!
3. Lighting
I prefer to have a schematic look of the final result as the project goes forward!
So once I’ve achieved my initial setup in modeling the main objects of the scene, I want to add a key light to see whether I’m on the right track or if I should continue down a different road.
Tweaking lights and trying to strike the perfect balance between light and dark is tons of fun!

Trying out different lightings
I used a V-Ray Rec light in directional mode as Key Light and some V-Ray Sphere lights among the bottles. Also, I applied a dim dome light for a tinted blue over dark shadows!
4. Creating textures in Substance Painter
Going back to my initial goals with this particular project, perfect lighting and detailed textures, it’s now time employ the Swiss army knife in 3D texturing software, the great Substance Painter!
Without Substance Painter, ‘Bottles of Life’ would’ve never come to fruition. It’s easy to use, smart and user-friendly!
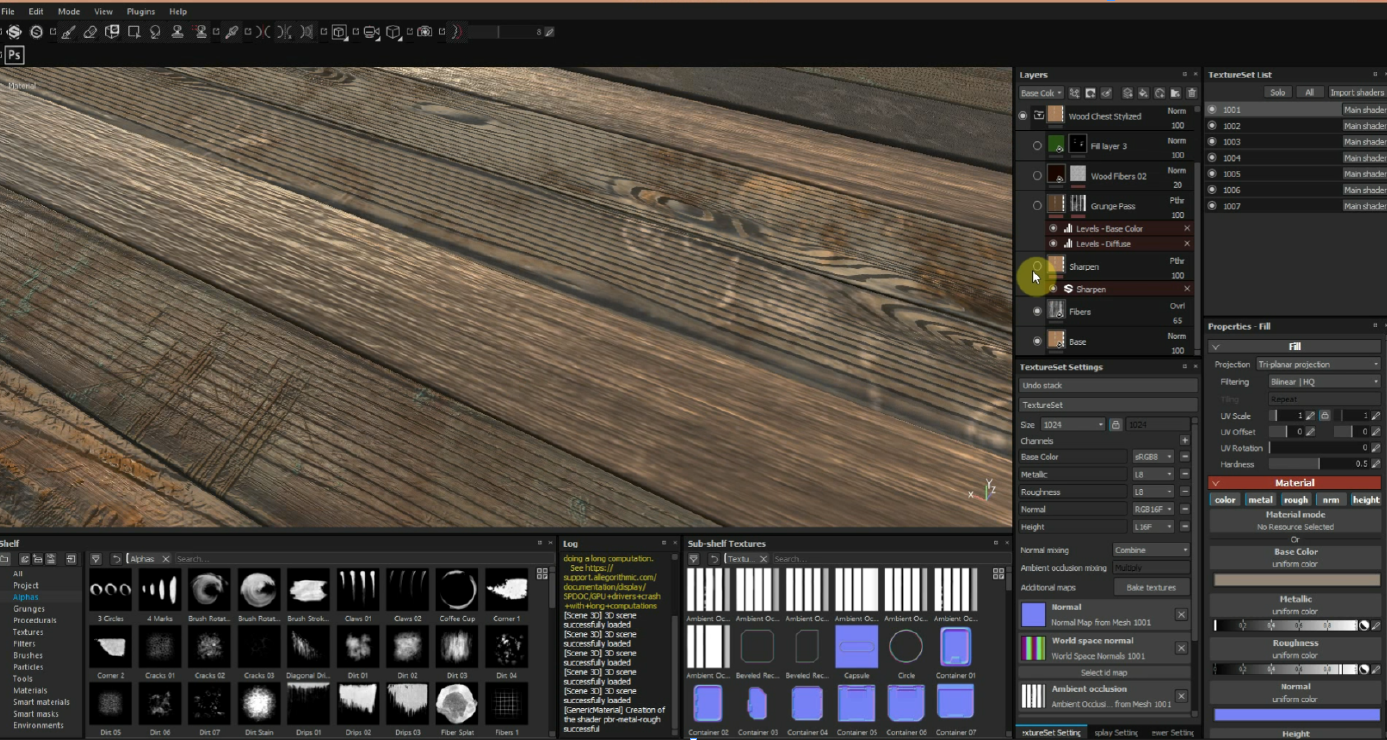
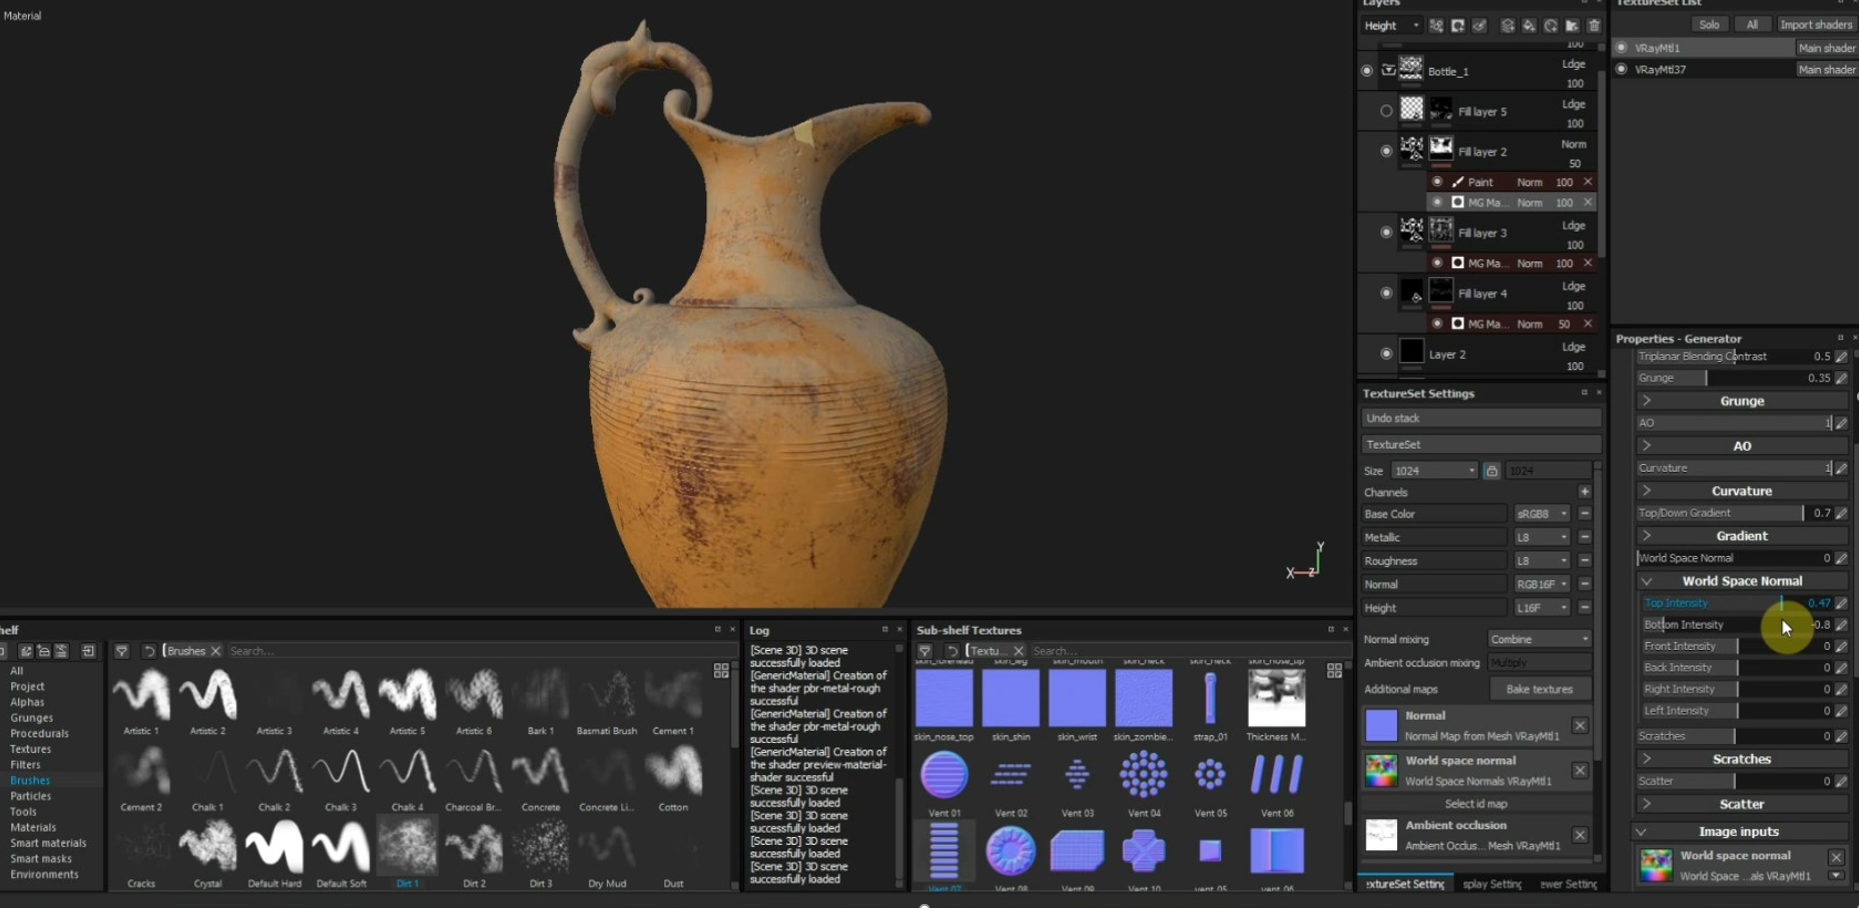
By importing your object with simple UVs and baking the texture in Substance Painter, you will have immediate access to numerous abilities such as brushes, alphas, smart material and lots of procedural textures! I usually start with a simple fill layer for the base color and then proceed with smart masks!
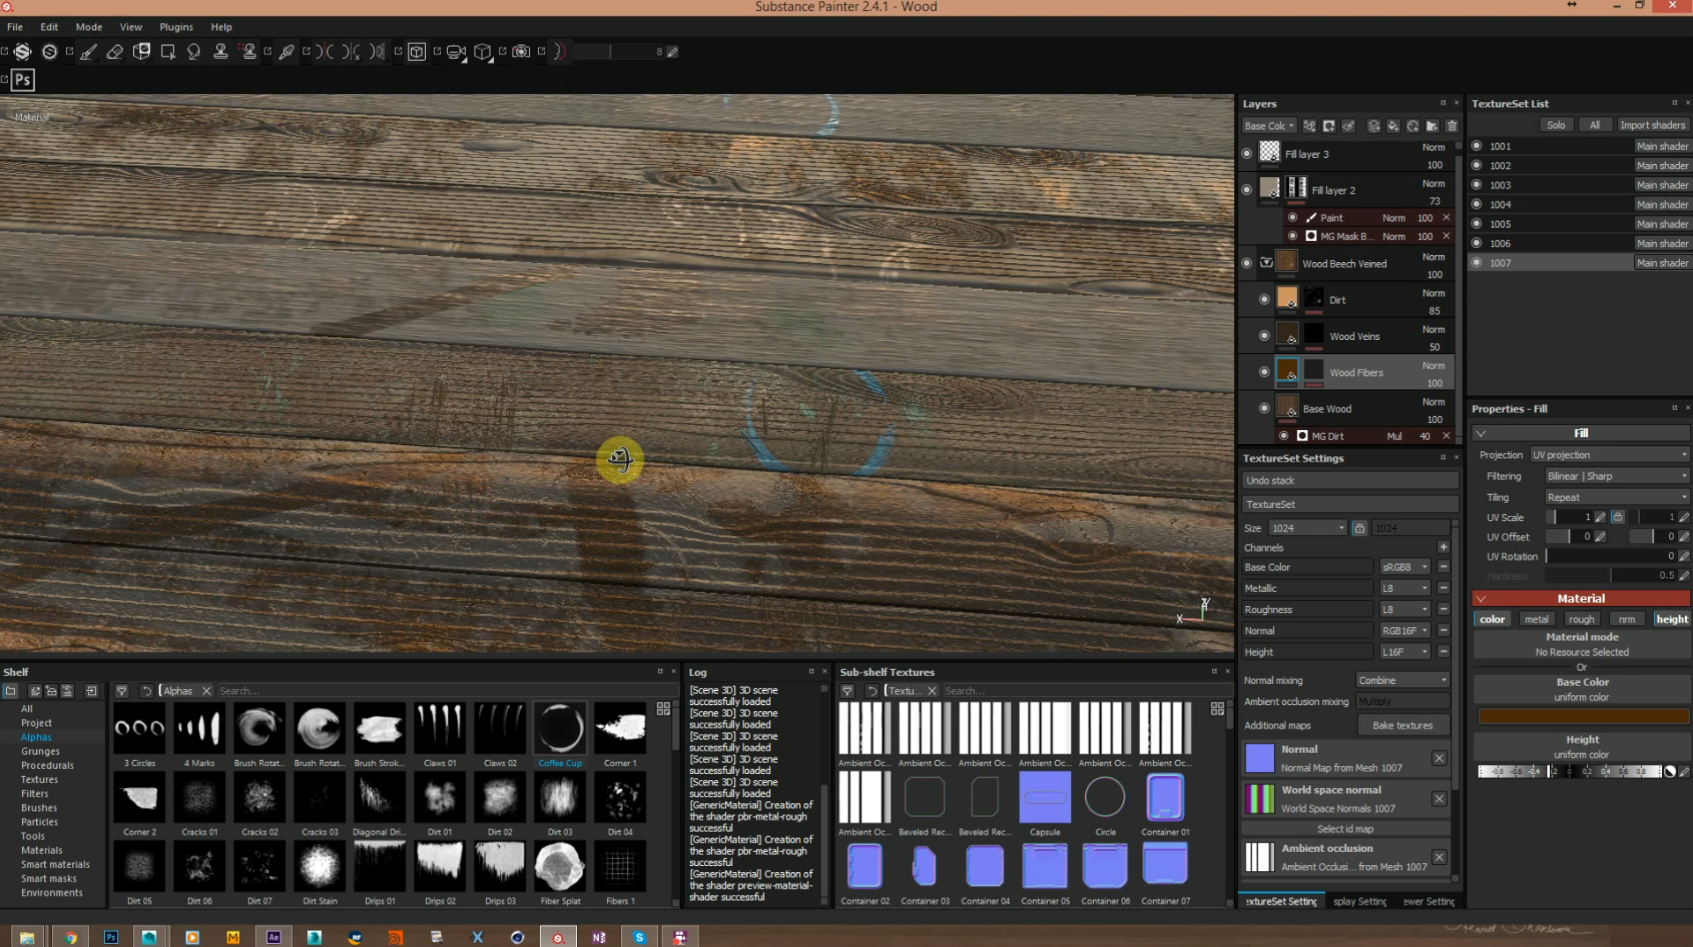
Texturing with Substance Painter
There are several magical maps that help you while working with Substance Painter, of which I found Curvature and Ambient occlusion the most important. You can also use world space map to define the top parts of your objects to easily apply the dust effect!
When creating realistic textures, it’s important to not just rely on smart or procedural pre-provided nodes. Instead, you should care about all sorts of man-made imperfections such as footprints effects on dust, wood scratches, dirt or even effects of objects absent from your scene which might’ve been there in the past.
To illustrate this, take a closer look at the blue color print on the table wood: There was a color bucket there before!
Once I get satisfying results with all the desired detailed textures, I will bake them in 4K or even 8K for some larger objects! For example, I created 8 UDIM textures for the table in Maya and 8k export from Substance Painter.
5. Setting the mood of the scene with spider webs
What better way to capture the mysterious atmosphere of an old and forgotten place than adding spider webs?!
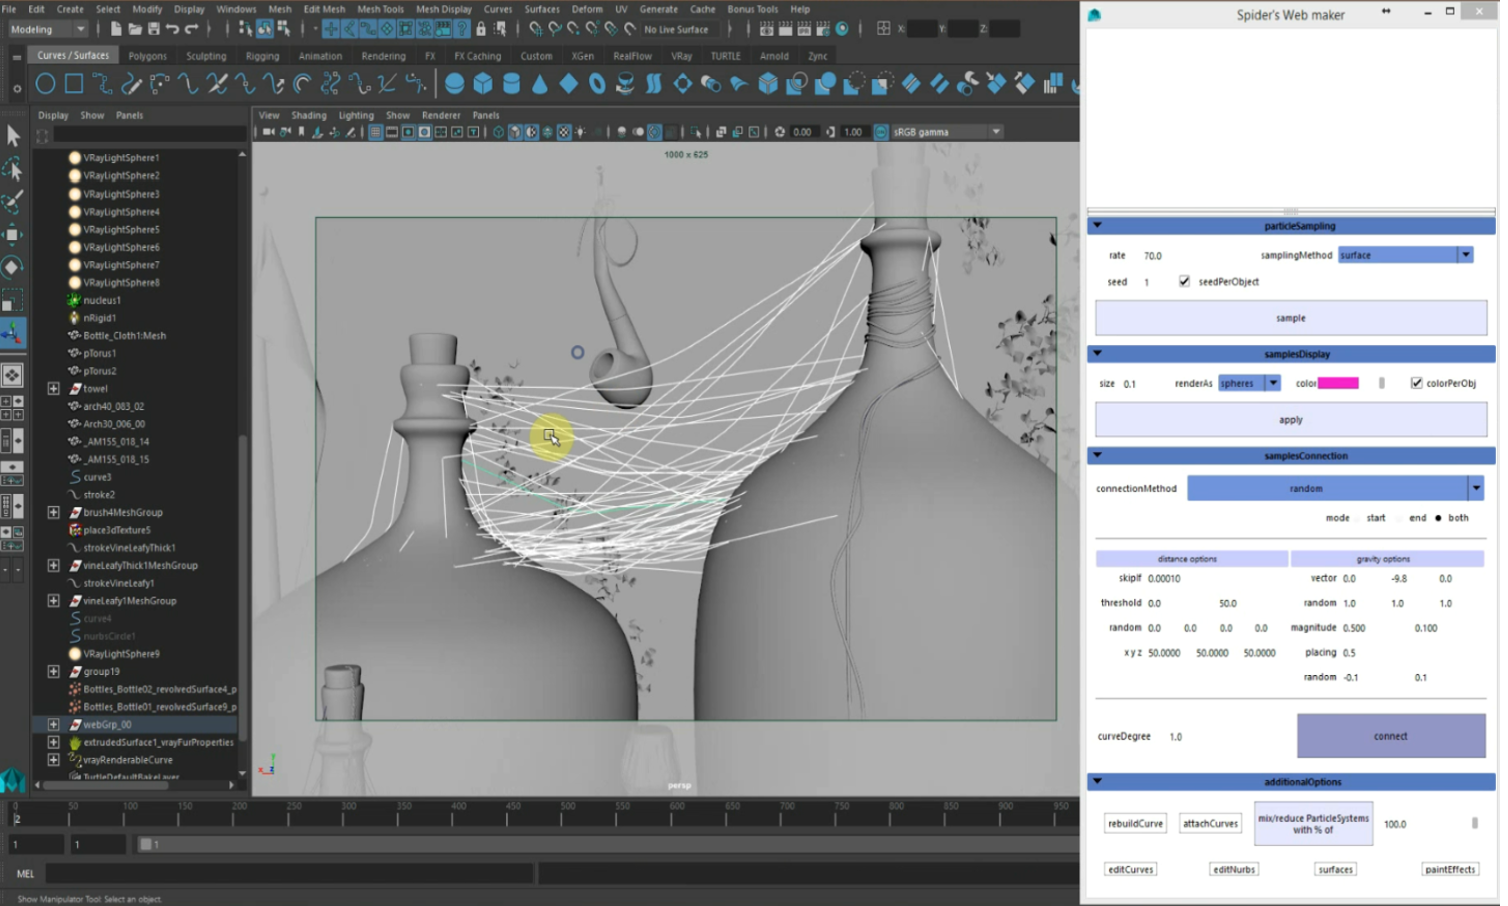
I used two different techniques for spider webs: modeling with surface curves and textures with opacity maps!
Thanks to the Spider’s web maker script, you can easily define your web between objects with your own options.
For the opacity spider webs, I just used a simple black and white texture which I found on Gleb Alexandrov’s website, combined with a simple V-Ray material!
Creating spider webs
6. Adding final details
Fine detailed models with perfect lights and decent textures, looks like we’re almost done!
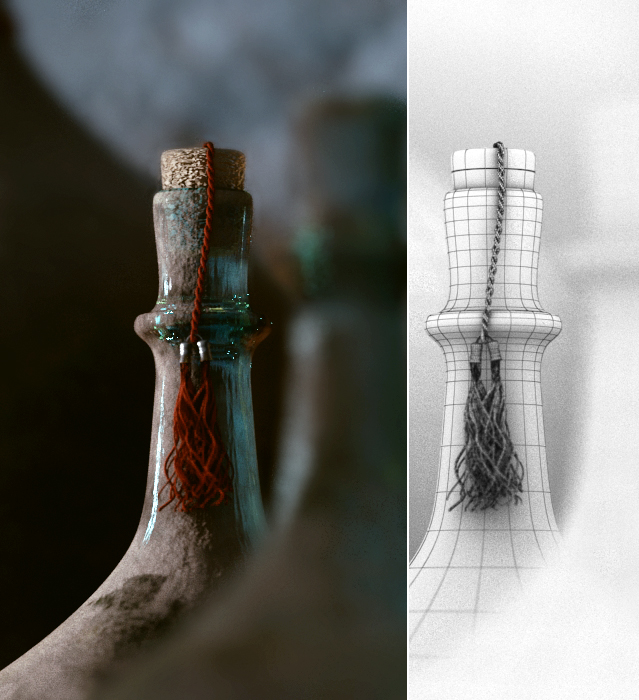
What we now want to do is spend additional time to add final touches. Like I mentioned before, it was at this point that I decided to add the rat tail.
The idea for this actually popped into my head right after seeing a big rat fooling around in our apartment dumpsters when I went up to the window for some fresh air.
Adding final touches
7. Final render setting & render elements
‘Bottles of Life’ was rendered in 2400 res.
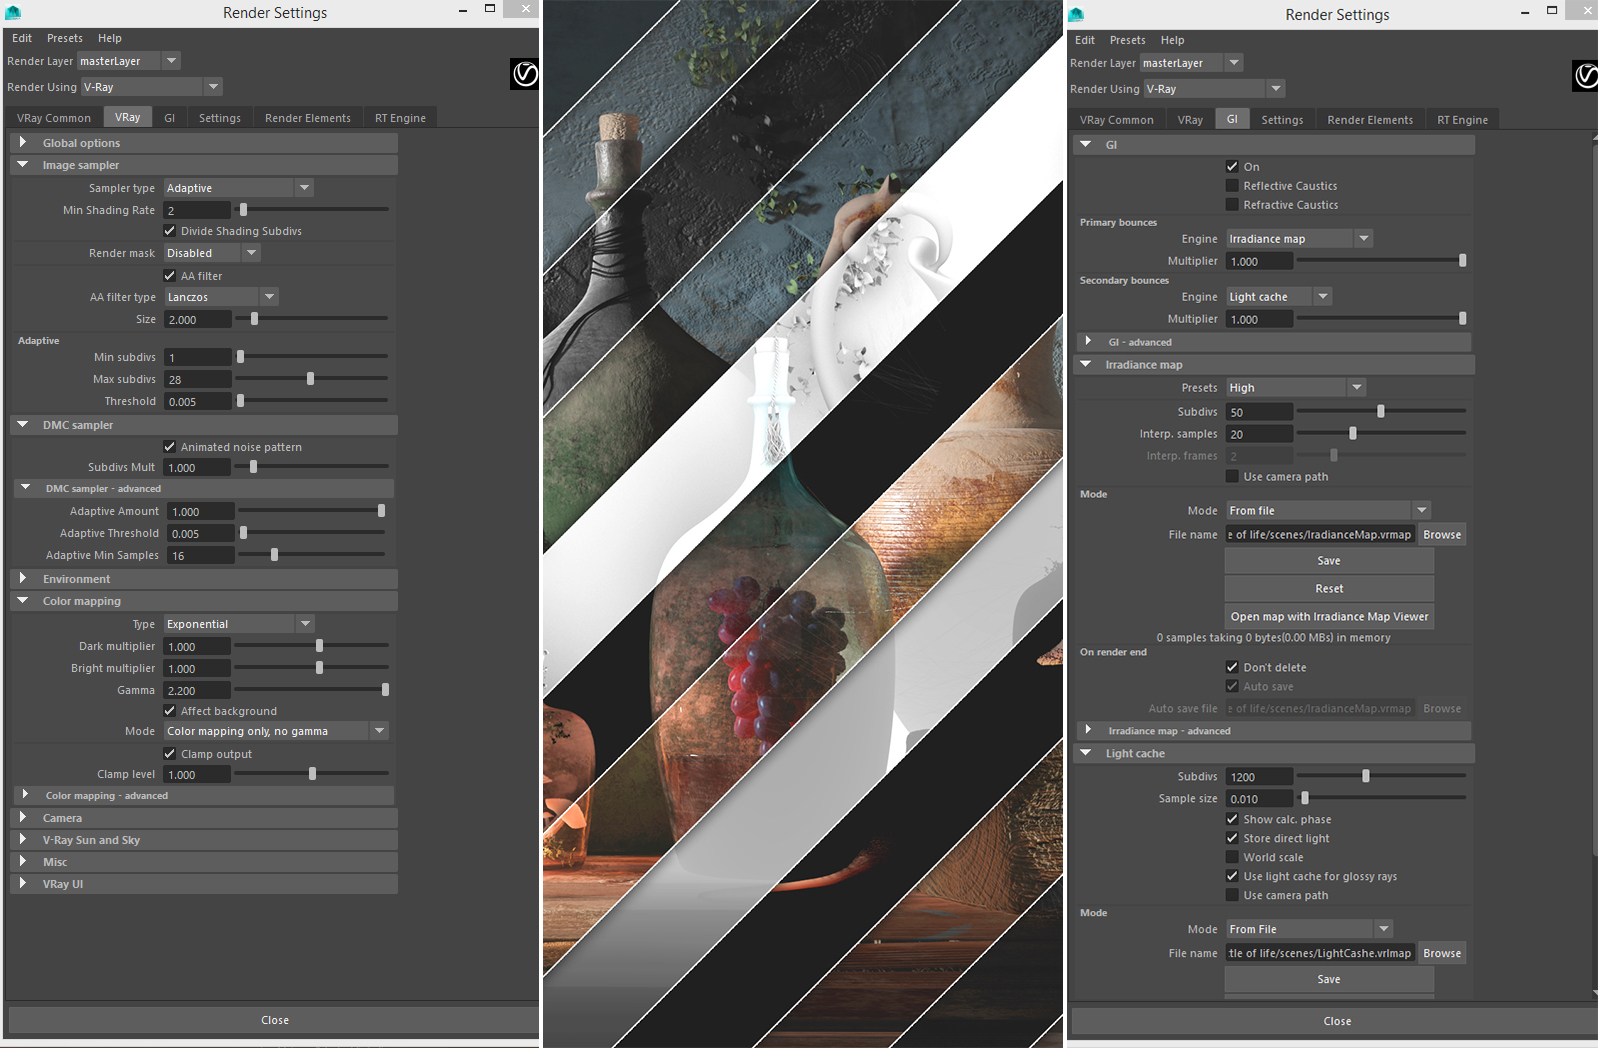
Since we have many refractions with 4k and 8k textures, it’s really important to have an optimized render setting to save time. Don’t forget to bake irradiance and light cache maps, as these save some serious render time!
Render setting
8. Post-production
Now it’s time to composite the layers in your composition app, which, for me, means Adobe After Effects.
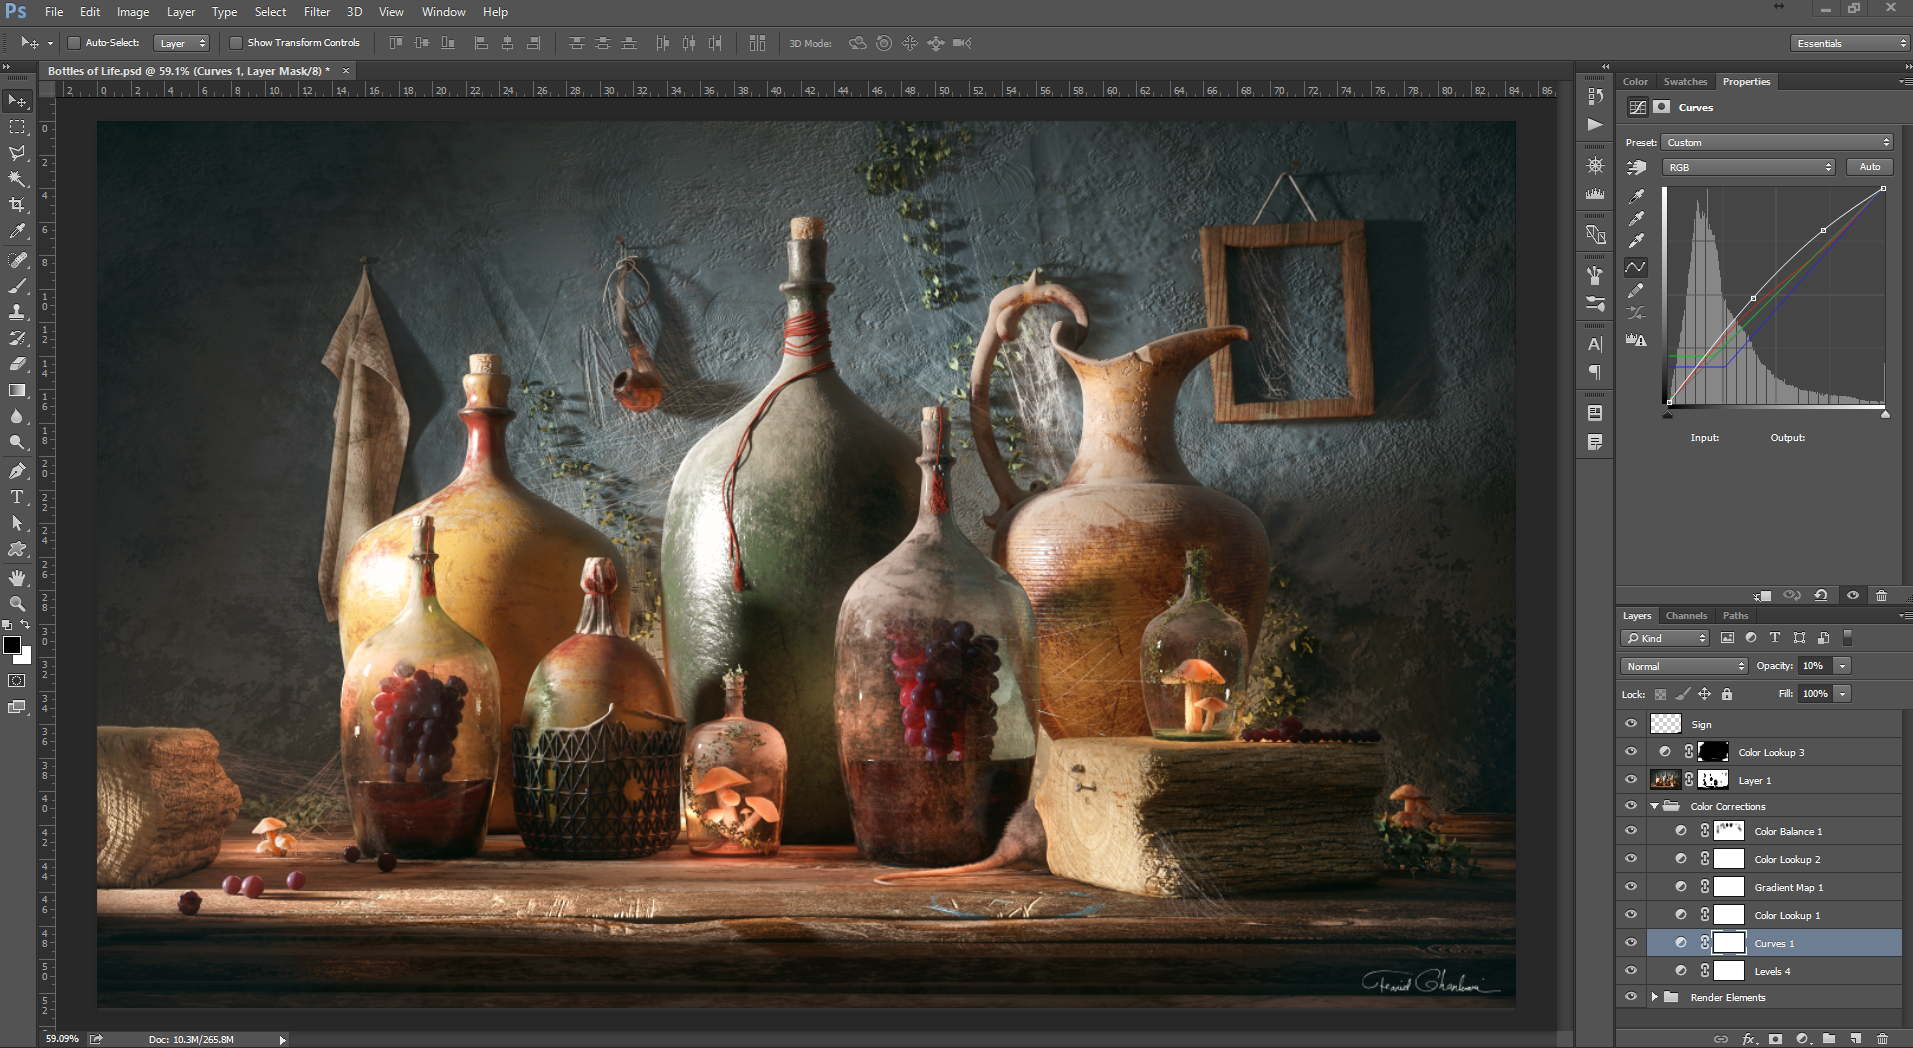
I am not a huge fan of many post productions. I strive to achieve the highest percentage of the final result in the 3D software itself rather than Post apps!
So I just added some fog effects on the left side of the image and did some slight color corrections!
Post-production
And there you go: ‘Bottles of Life’ is finished!
Quite easy :-)
Thanks for reading.
- Farid Ghanbari -
Thank you so much to Farid Ghanbari for this amazing insight. If you want to learn more about the artist behind the image, be sure to check out our interview with the RebusFarm 3D Artist of the Month!
And if you enjoyed this article, reach out to Farid and let him know:

